Managing Master Data
Managing Master Data
Click the Master Data expandable menu to view the data-related tasks that you can perform using the application.
Create master data types
Load master data
Managing Master Data Types
Creating Master Data Types
To create a master data type:
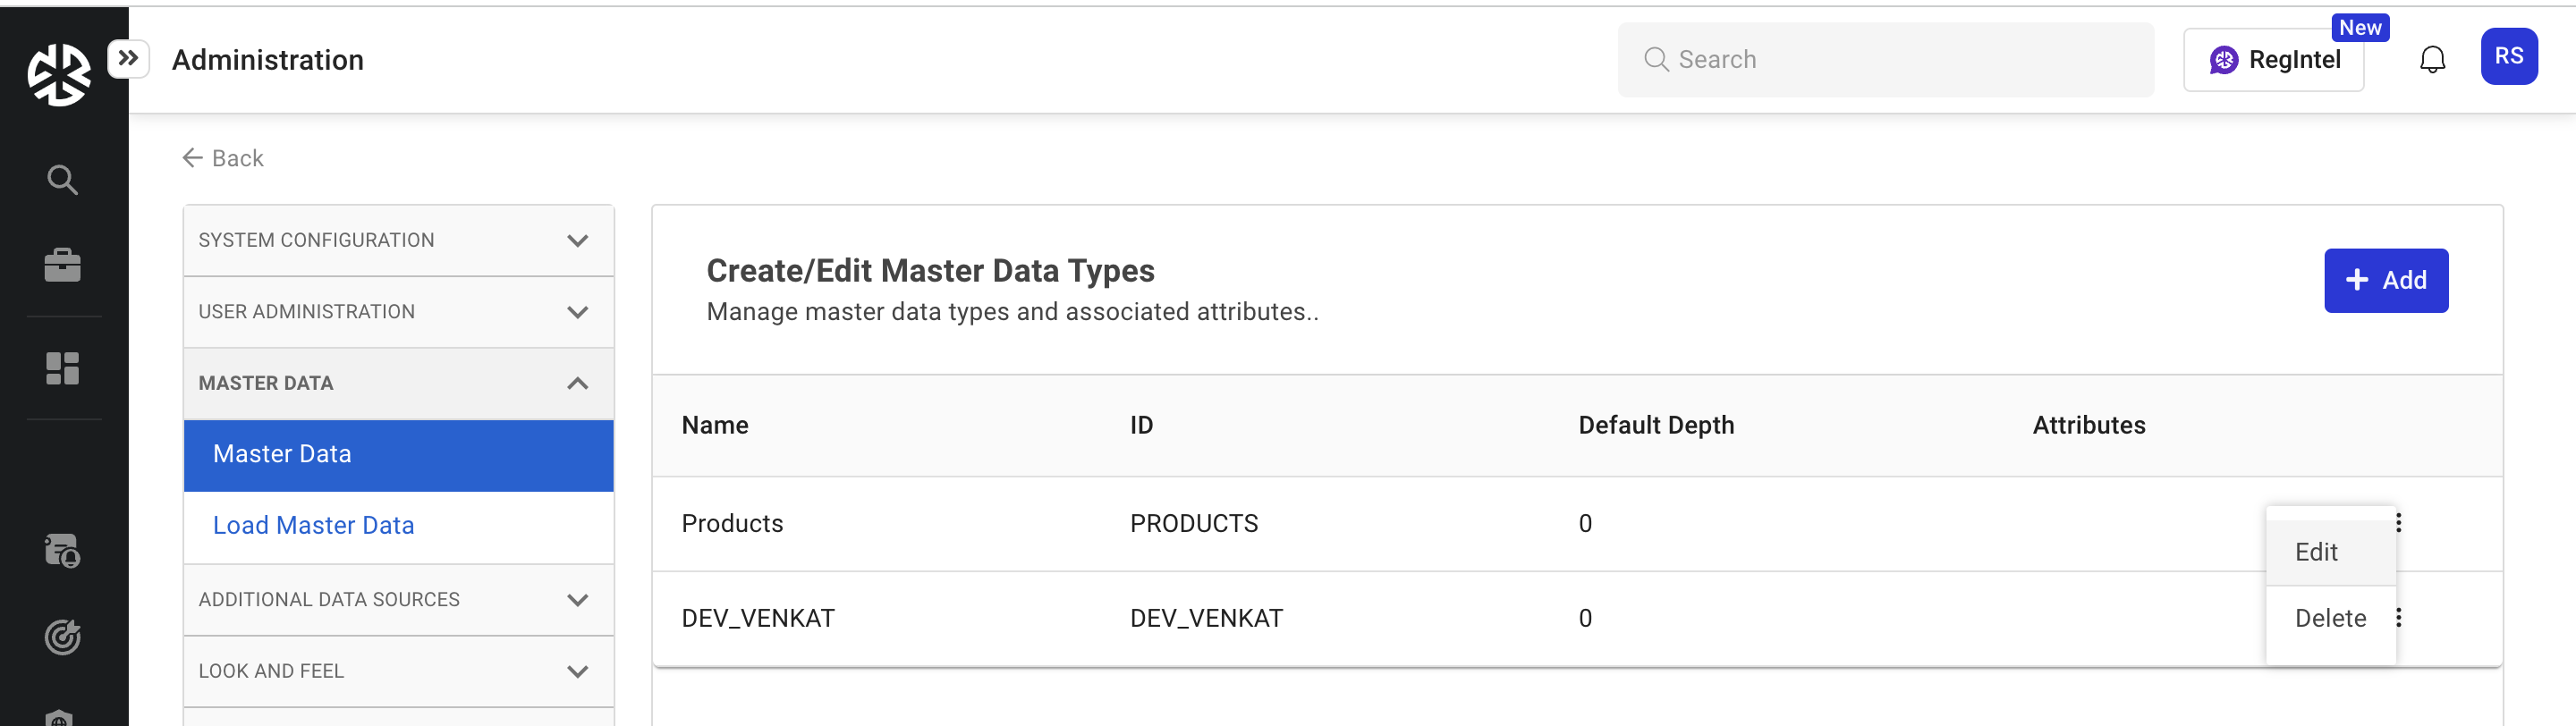
From the expanded menu, click on Master Data.
The Create/Edit Master Data Types page appears.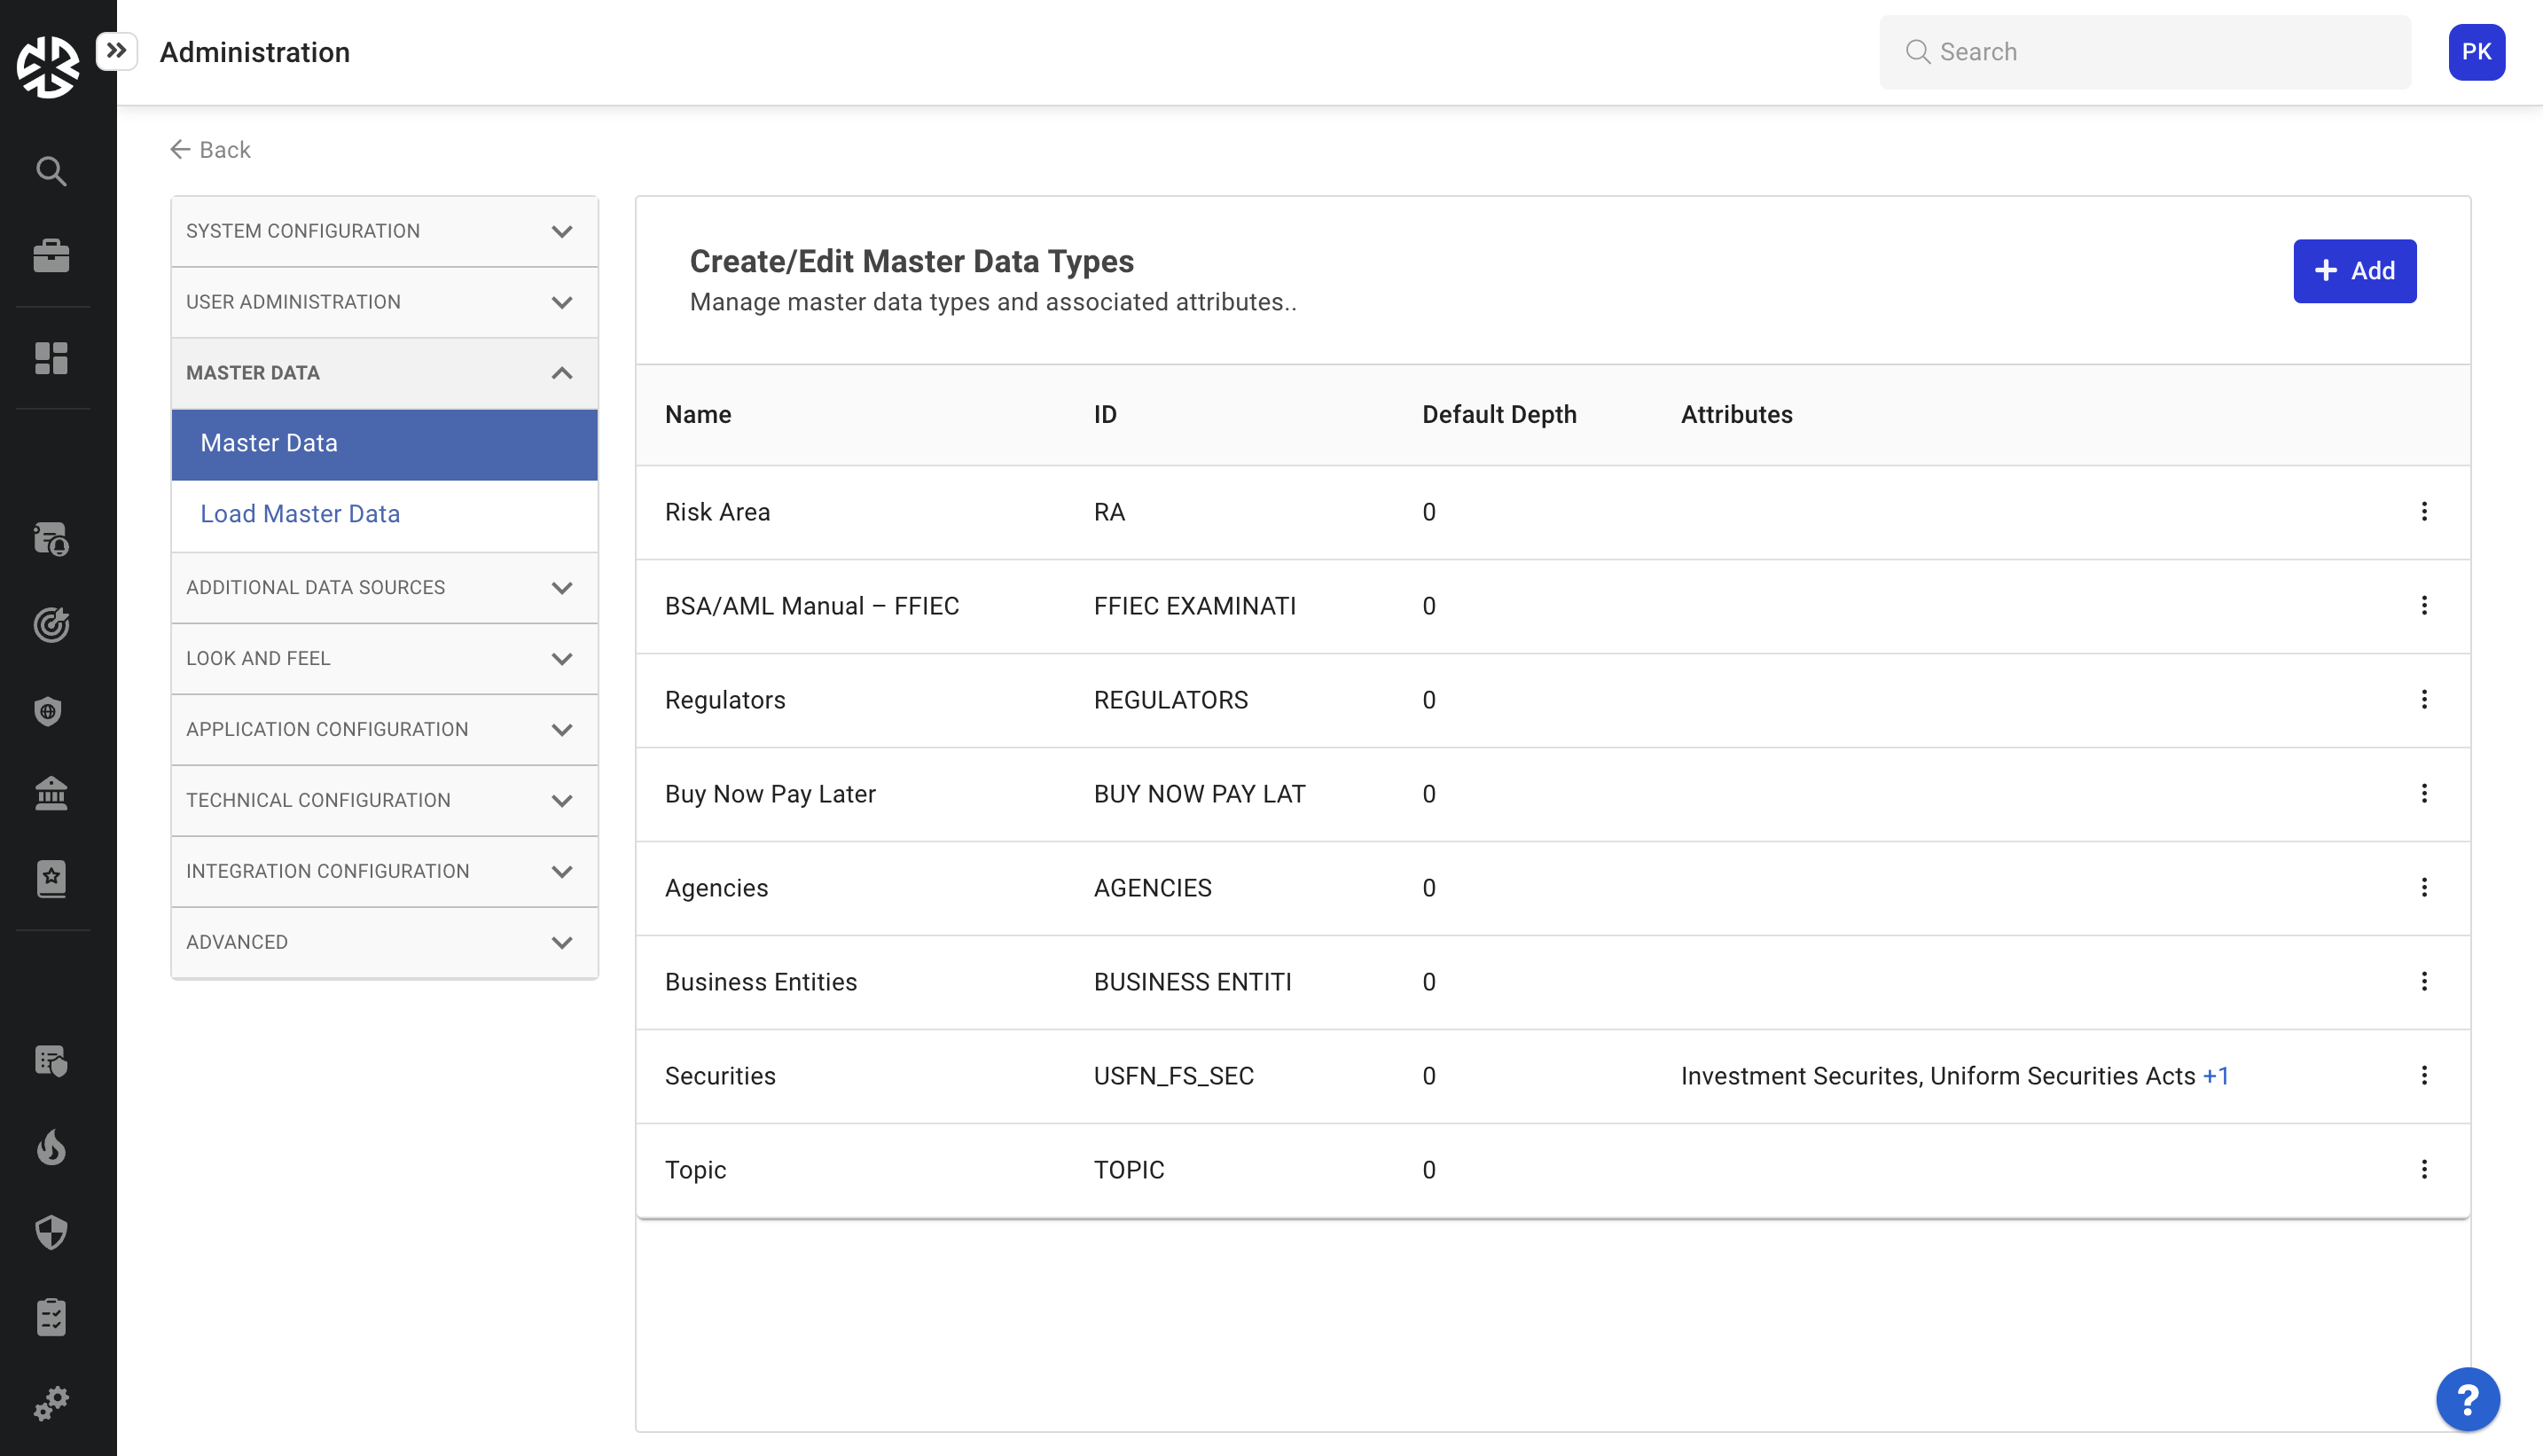
Click Add.
The Add Master Data Type modal appears.
Enter the Name, ID, and Default depth of the master data type in the fields provided.
Add Attributes associated with the data type as appropriate.
Click Save.
Editing a Master Data Type
To edit a master data type:
Click the Ellipsis corresponding to the master data type that you wish to edit; select Edit.
The Edit Master Data Type modal appears.
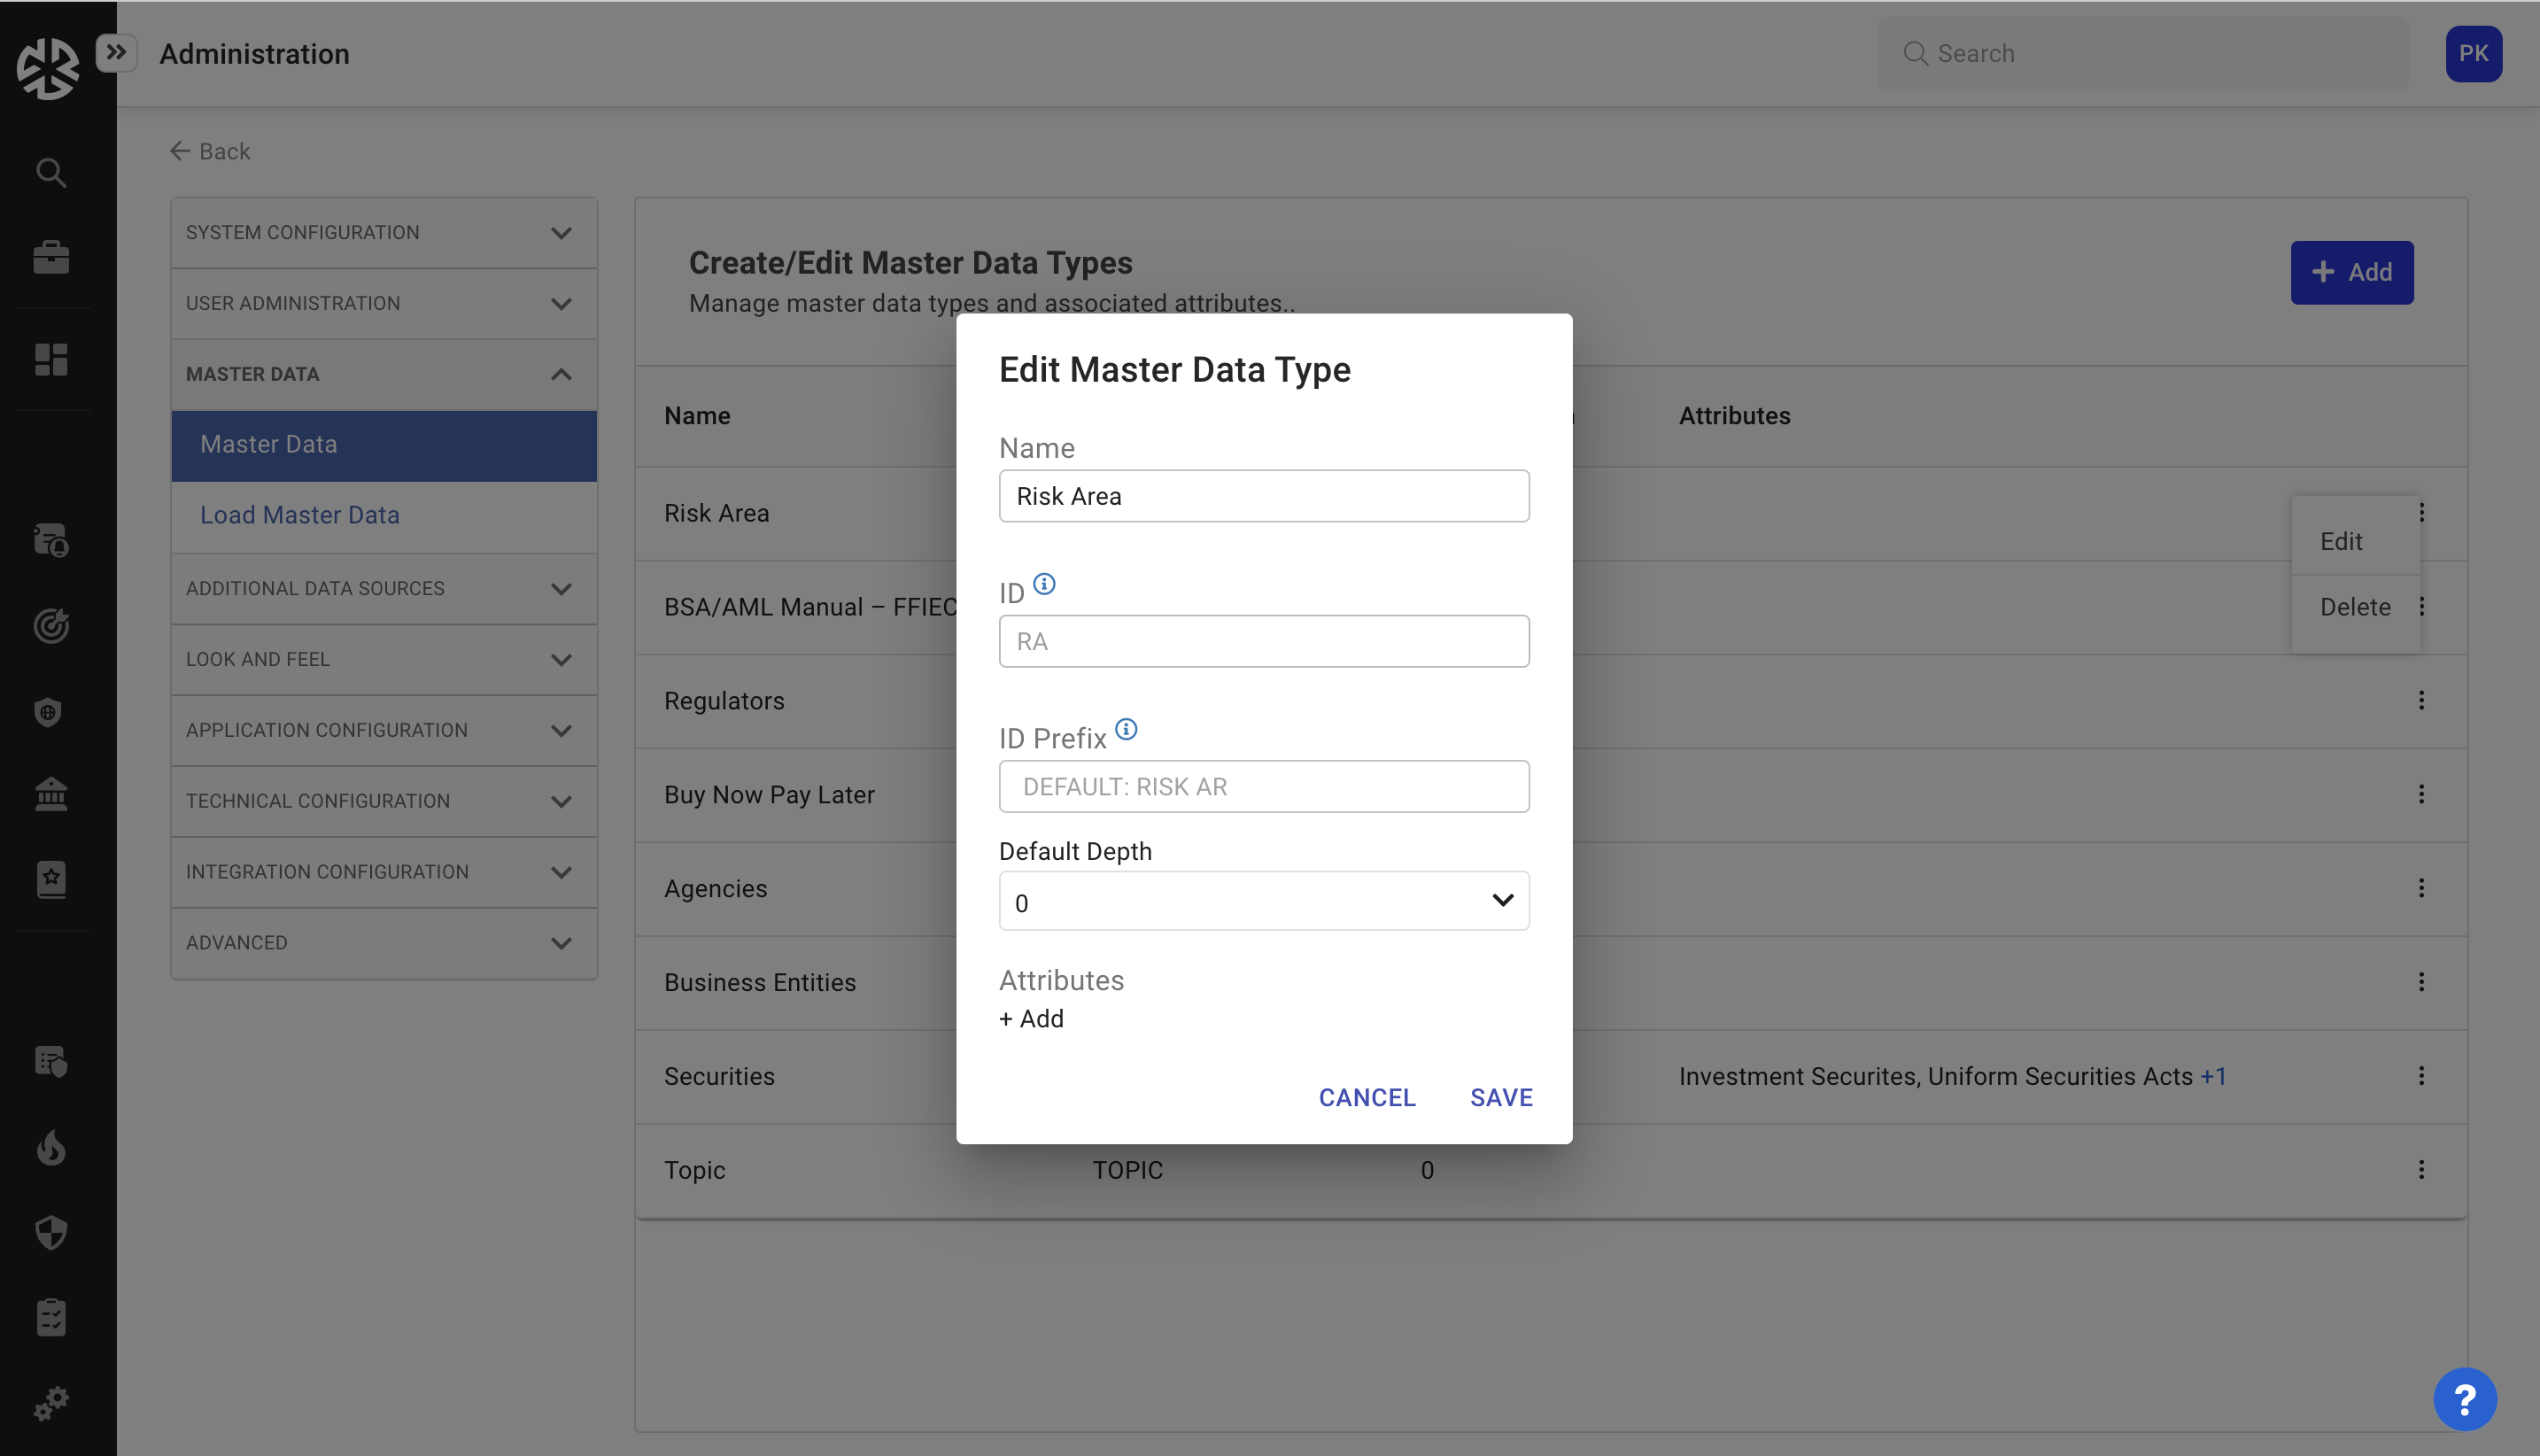
Use this modal to update details associated with the master data type that you want to edit.
Update the Name and Default Depth of the data type.
Update the data type Attributes as appropriate. Use the Add button to create new attributes.
Click Save.
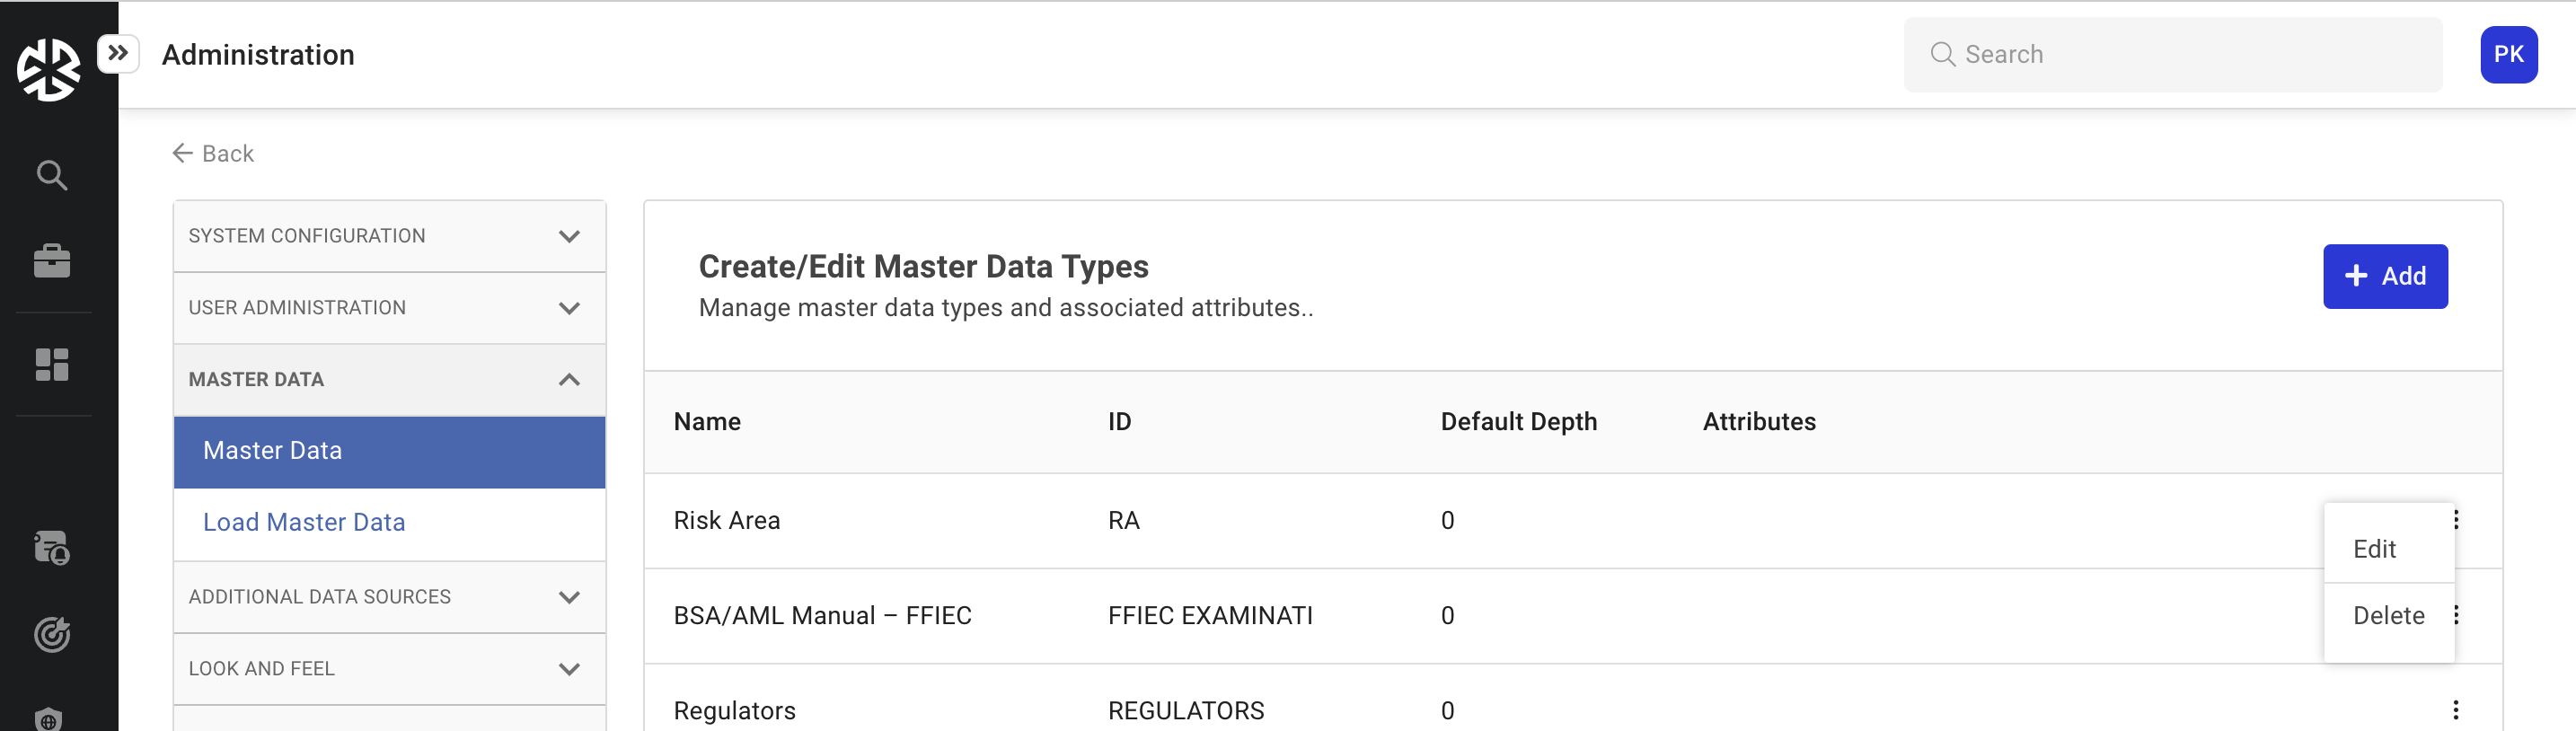
Deleting a Master Data Type
To delete a master data type, click the Ellipsis corresponding to the master data type you wish to delete and select Delete.
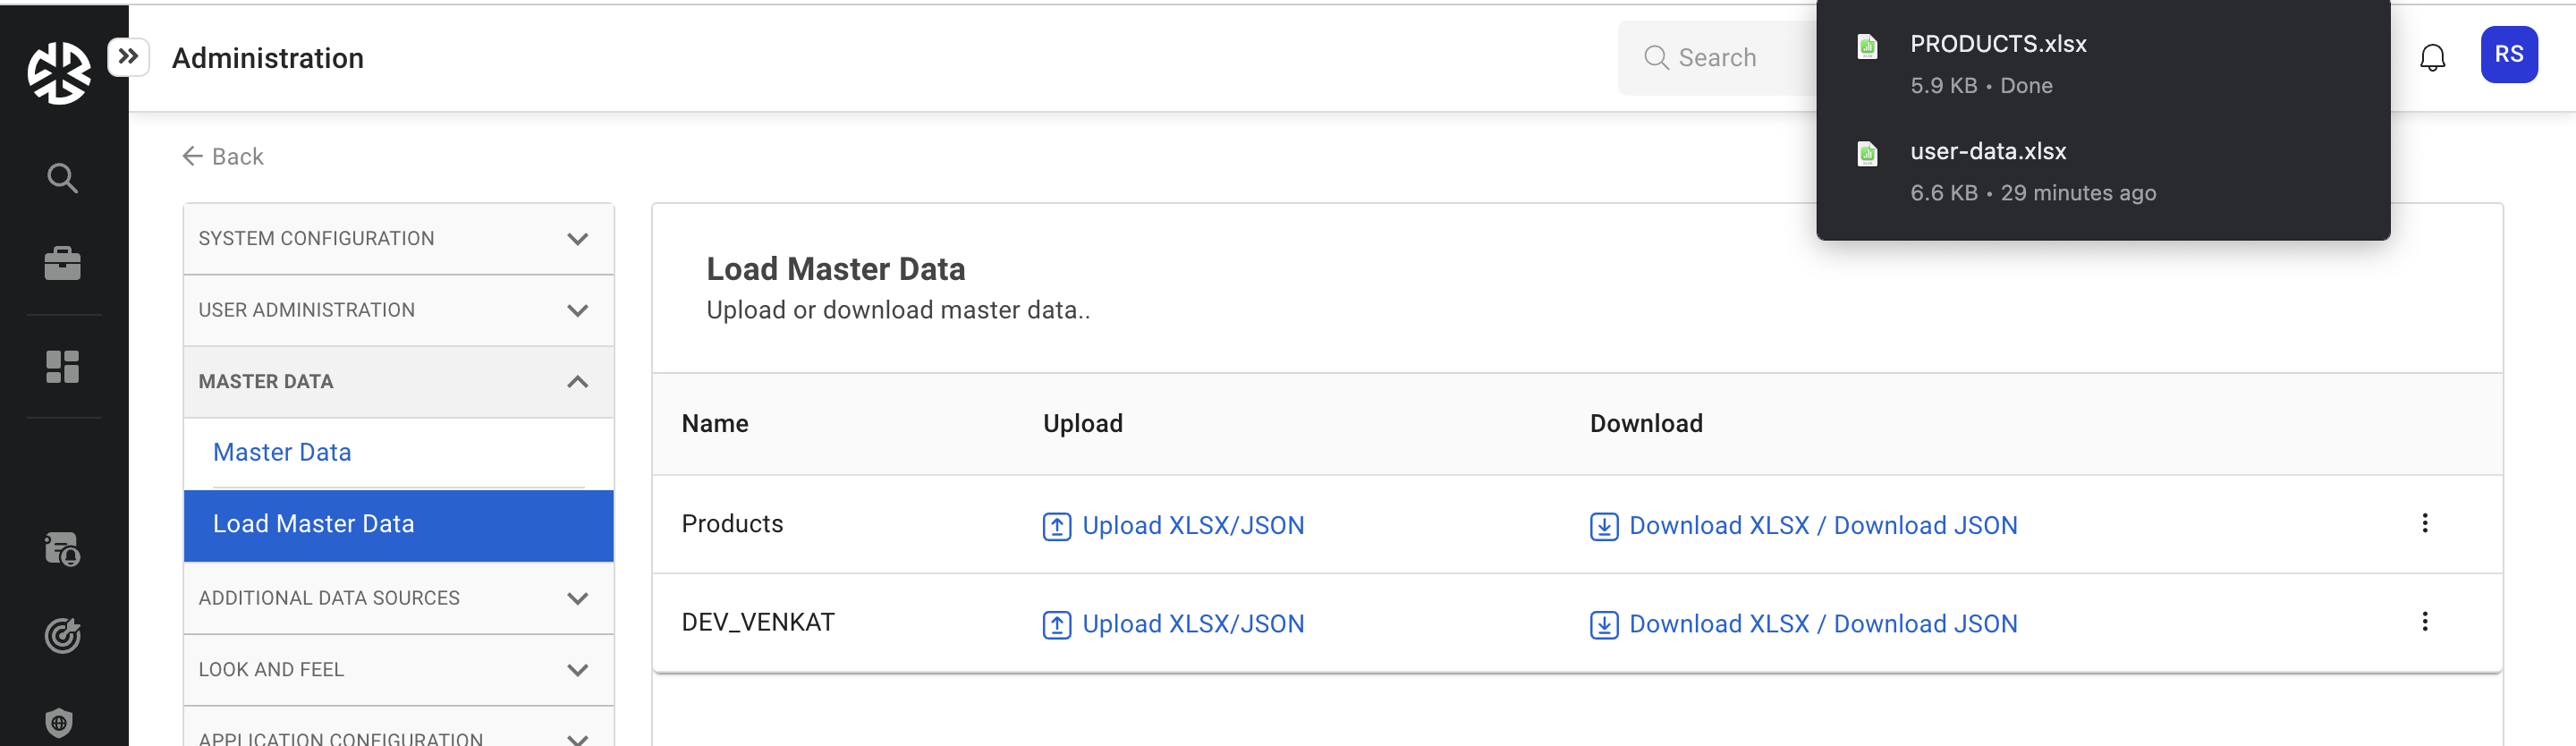
Loading and Downloading Master Data
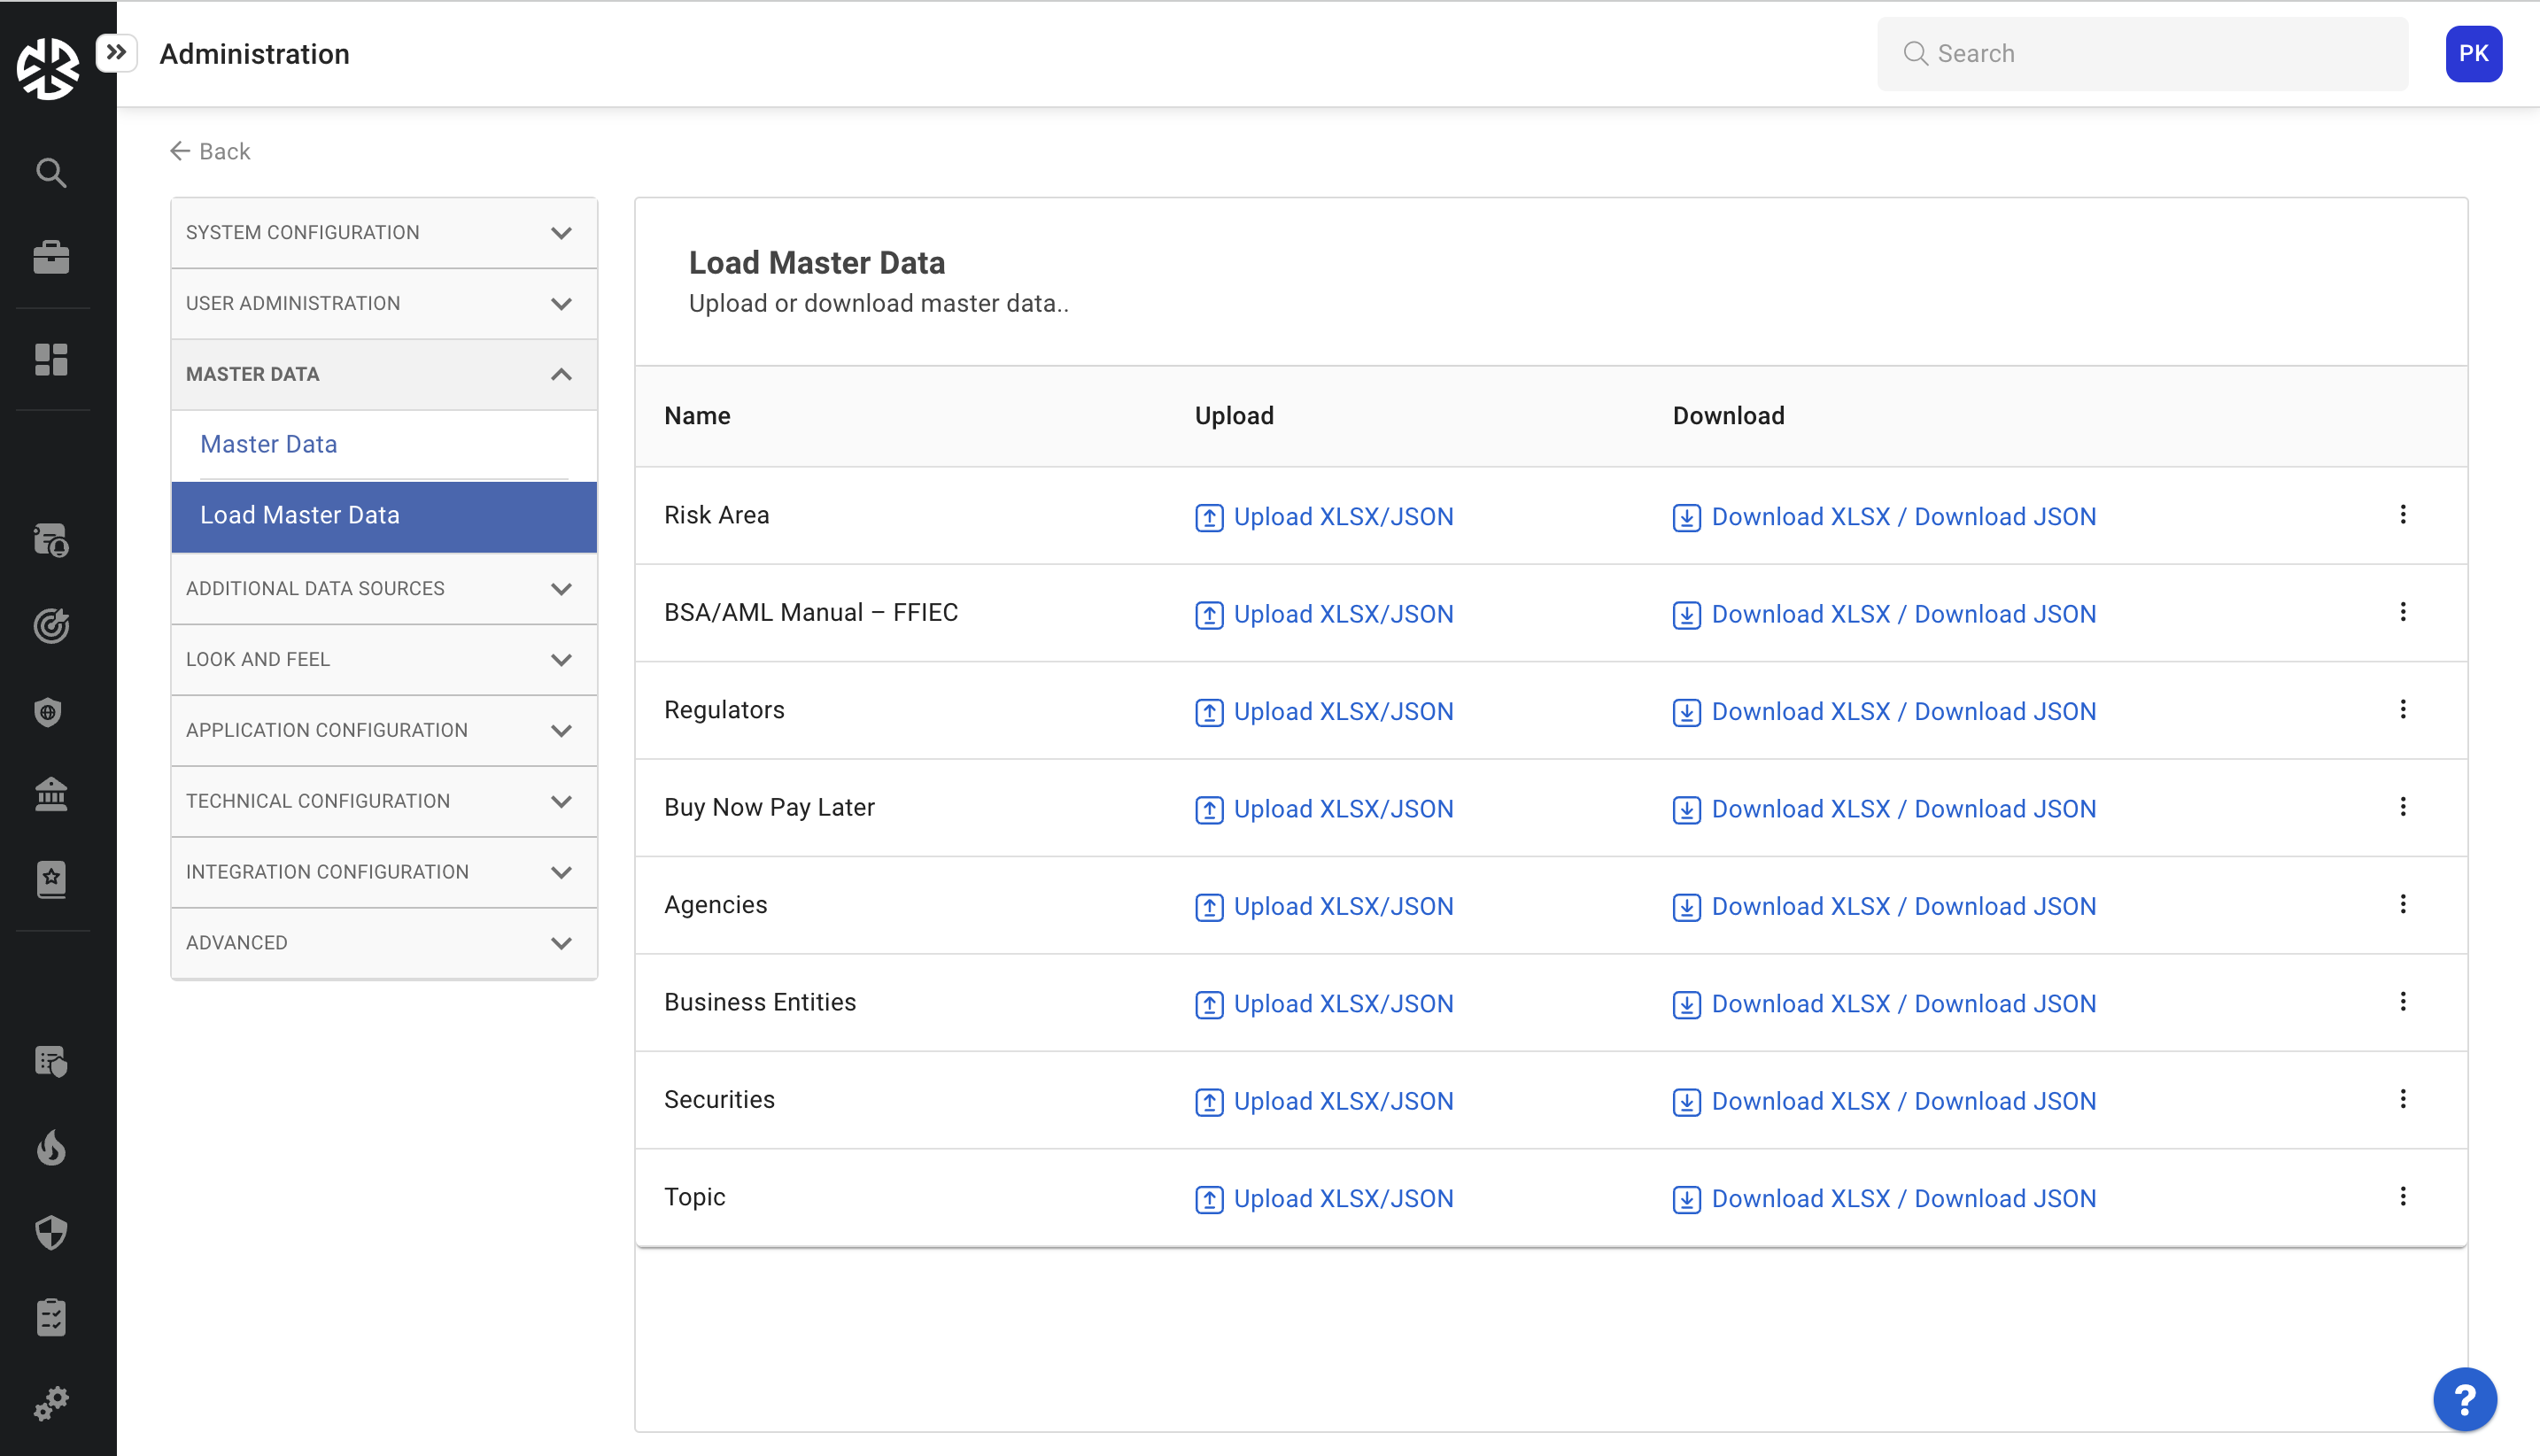
Use the Master Data > Load Master Data page to load or download master data.
Loading Master Data
To load master data:
From the Master Data menu, click Load Master Data.
The Load Master Data page appears, listing all the master data types created in the system.
Click the Ellipsis corresponding to the Master Data Type you wish to edit and select Edit Data from the options that appear.

The Edit Master Data page appears. Use this page to customize the master data as appropriate.
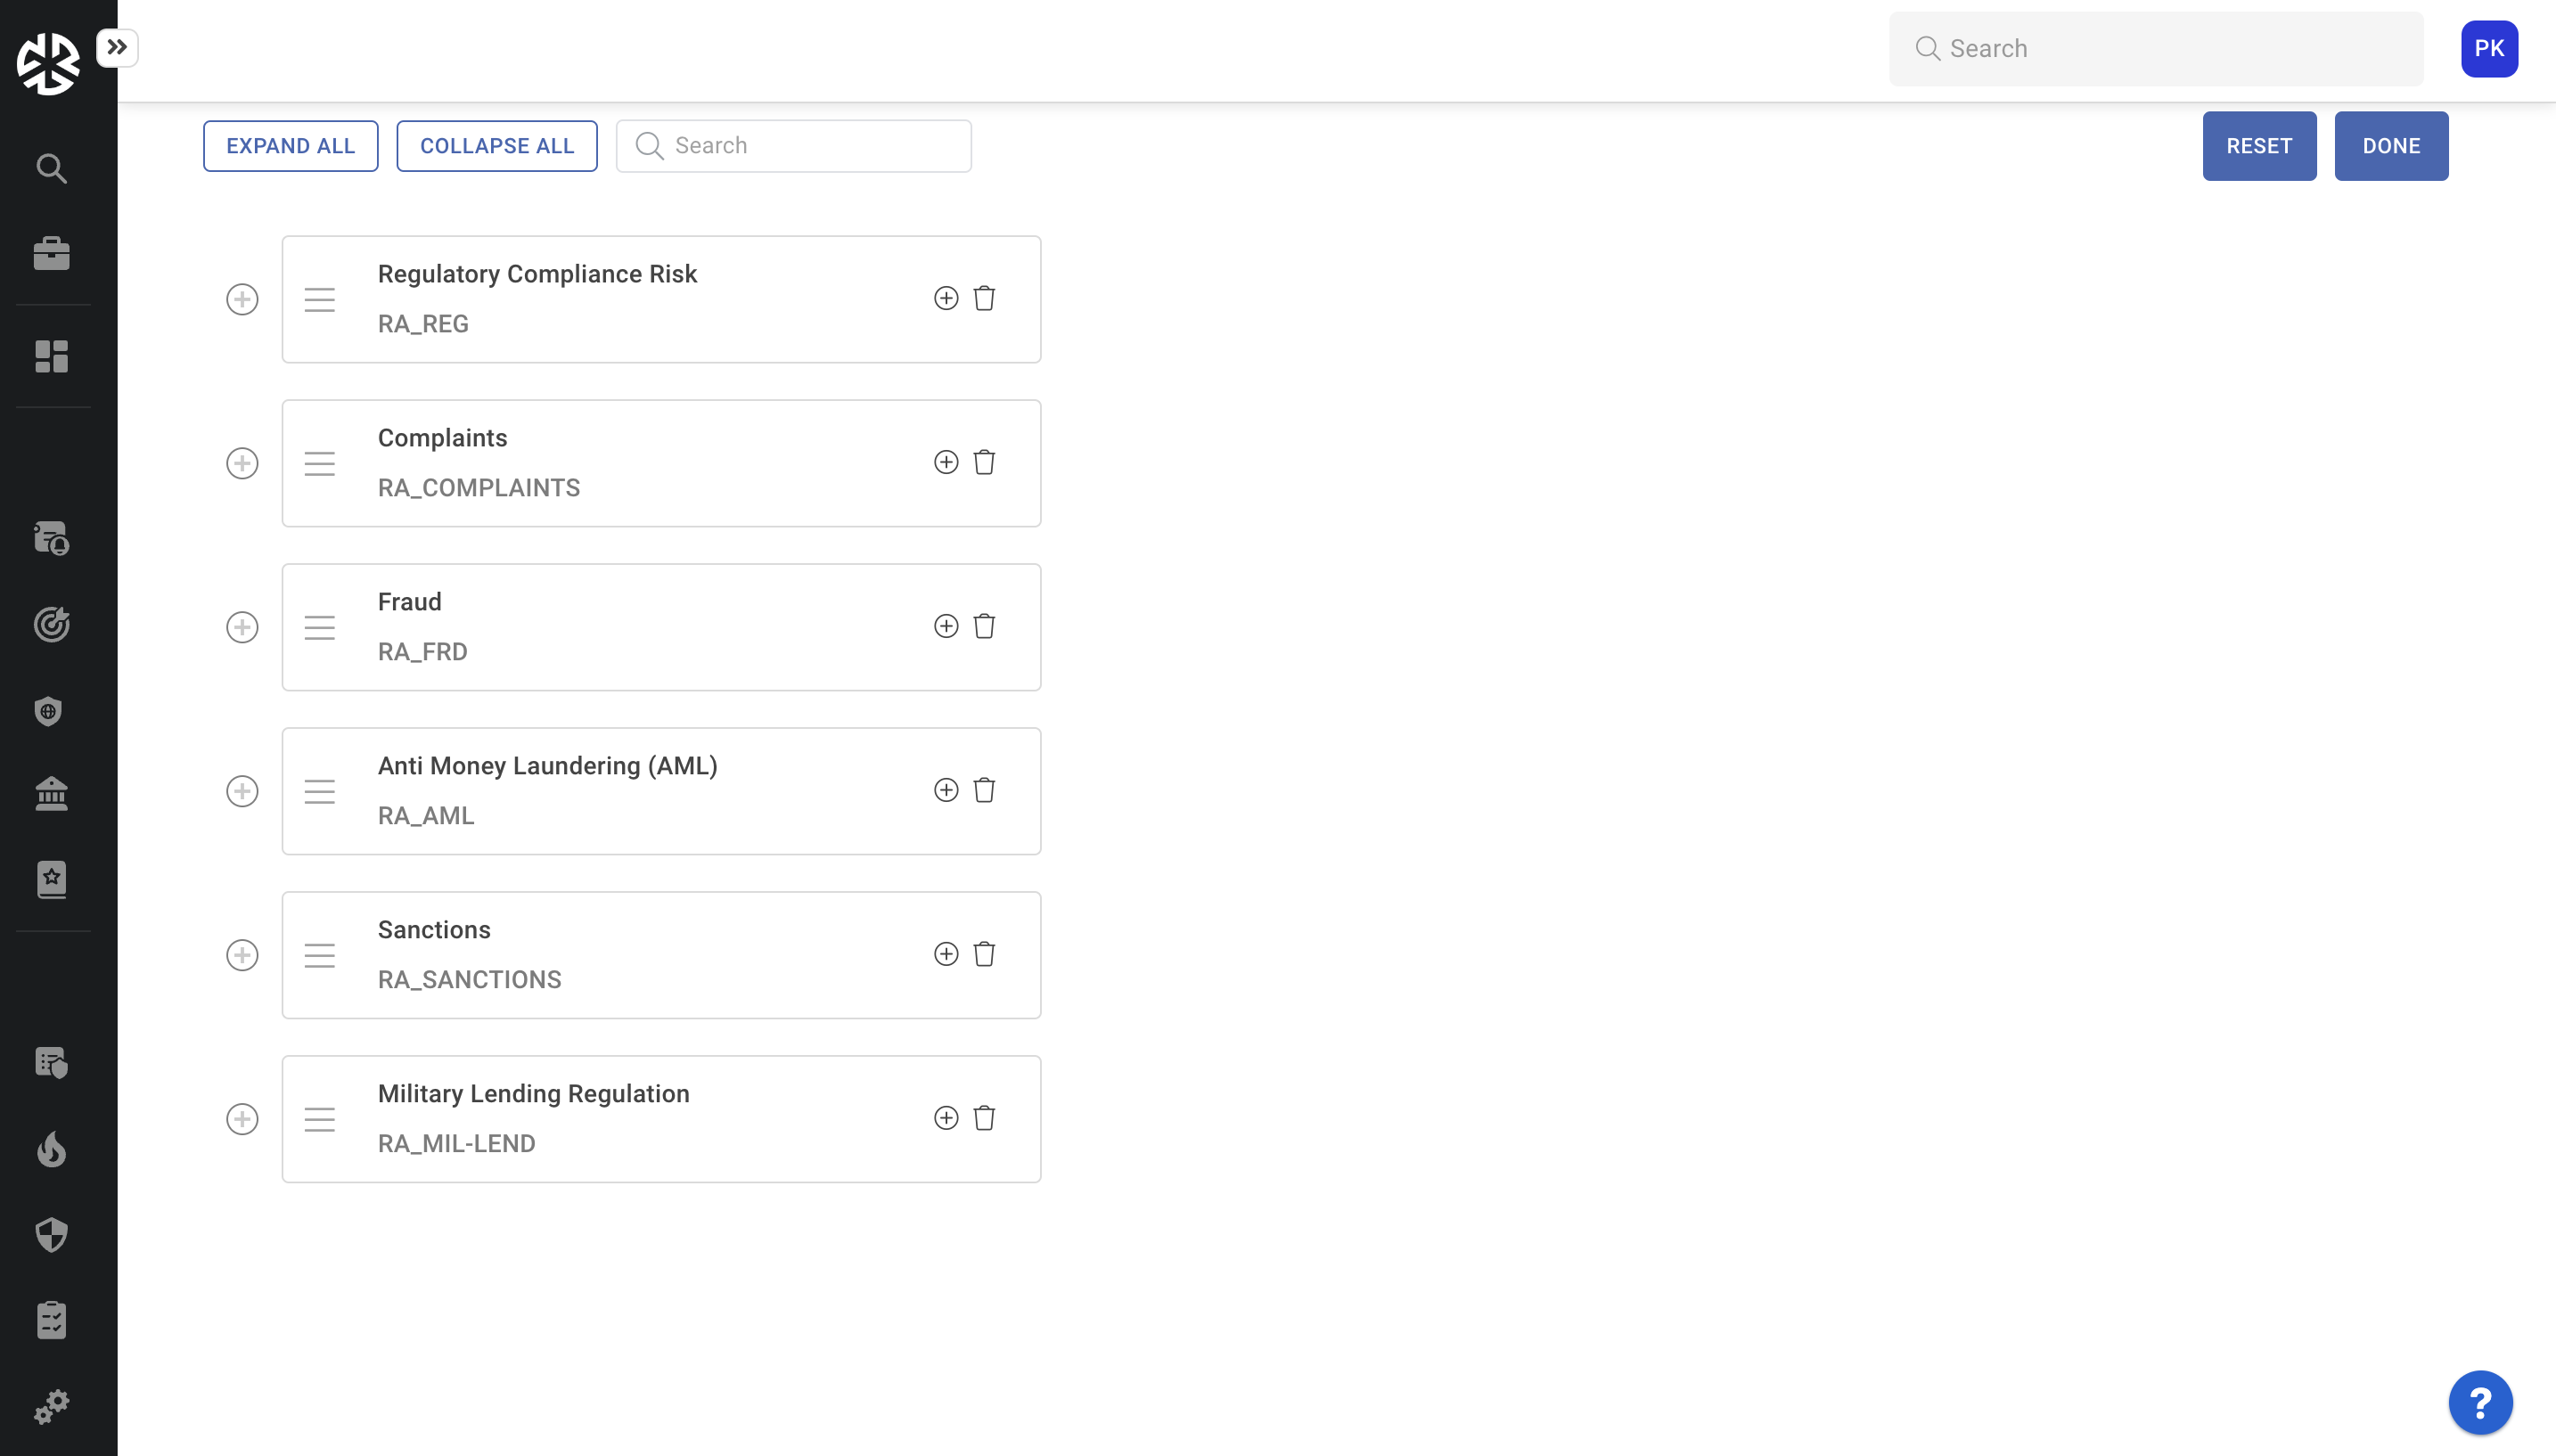
Use customization options to update master data.
Expand Master Data: Click the Expand icon to view details associated with a specific master data item, or click Expand All to expand all items.
Collapse Master Data: Click the Collapse icon to collapse a specific master data item, or click Collapse All to collapse all items.
Search for a Master Data Item: Start entering the master data item that you are searching for and select the master data item you need from the options that appear.
Move Master Data Item: Drag and drop the item anywhere in the master data hierarchy to reorganize the way master data is structured.
Rename Master Data Item: Click on a master data name to enable editing, and enter the new name as required.
Adding a Master Data Sub Item: Click the '+' adjacent to a master data item to add a child master data item.
Deleting a Master Data Item: Click the Delete icon to delete a master data item.
Click Done to save the changes made to the Master Data, or click Reset to revert the changes you made.
Uploading Master Data
To upload master data:
Click the Upload XLSX/JSON link corresponding to the master data type to which the data you want to upload belongs.
Select Update or Insert to update or insert existing master data based on the master data ID.
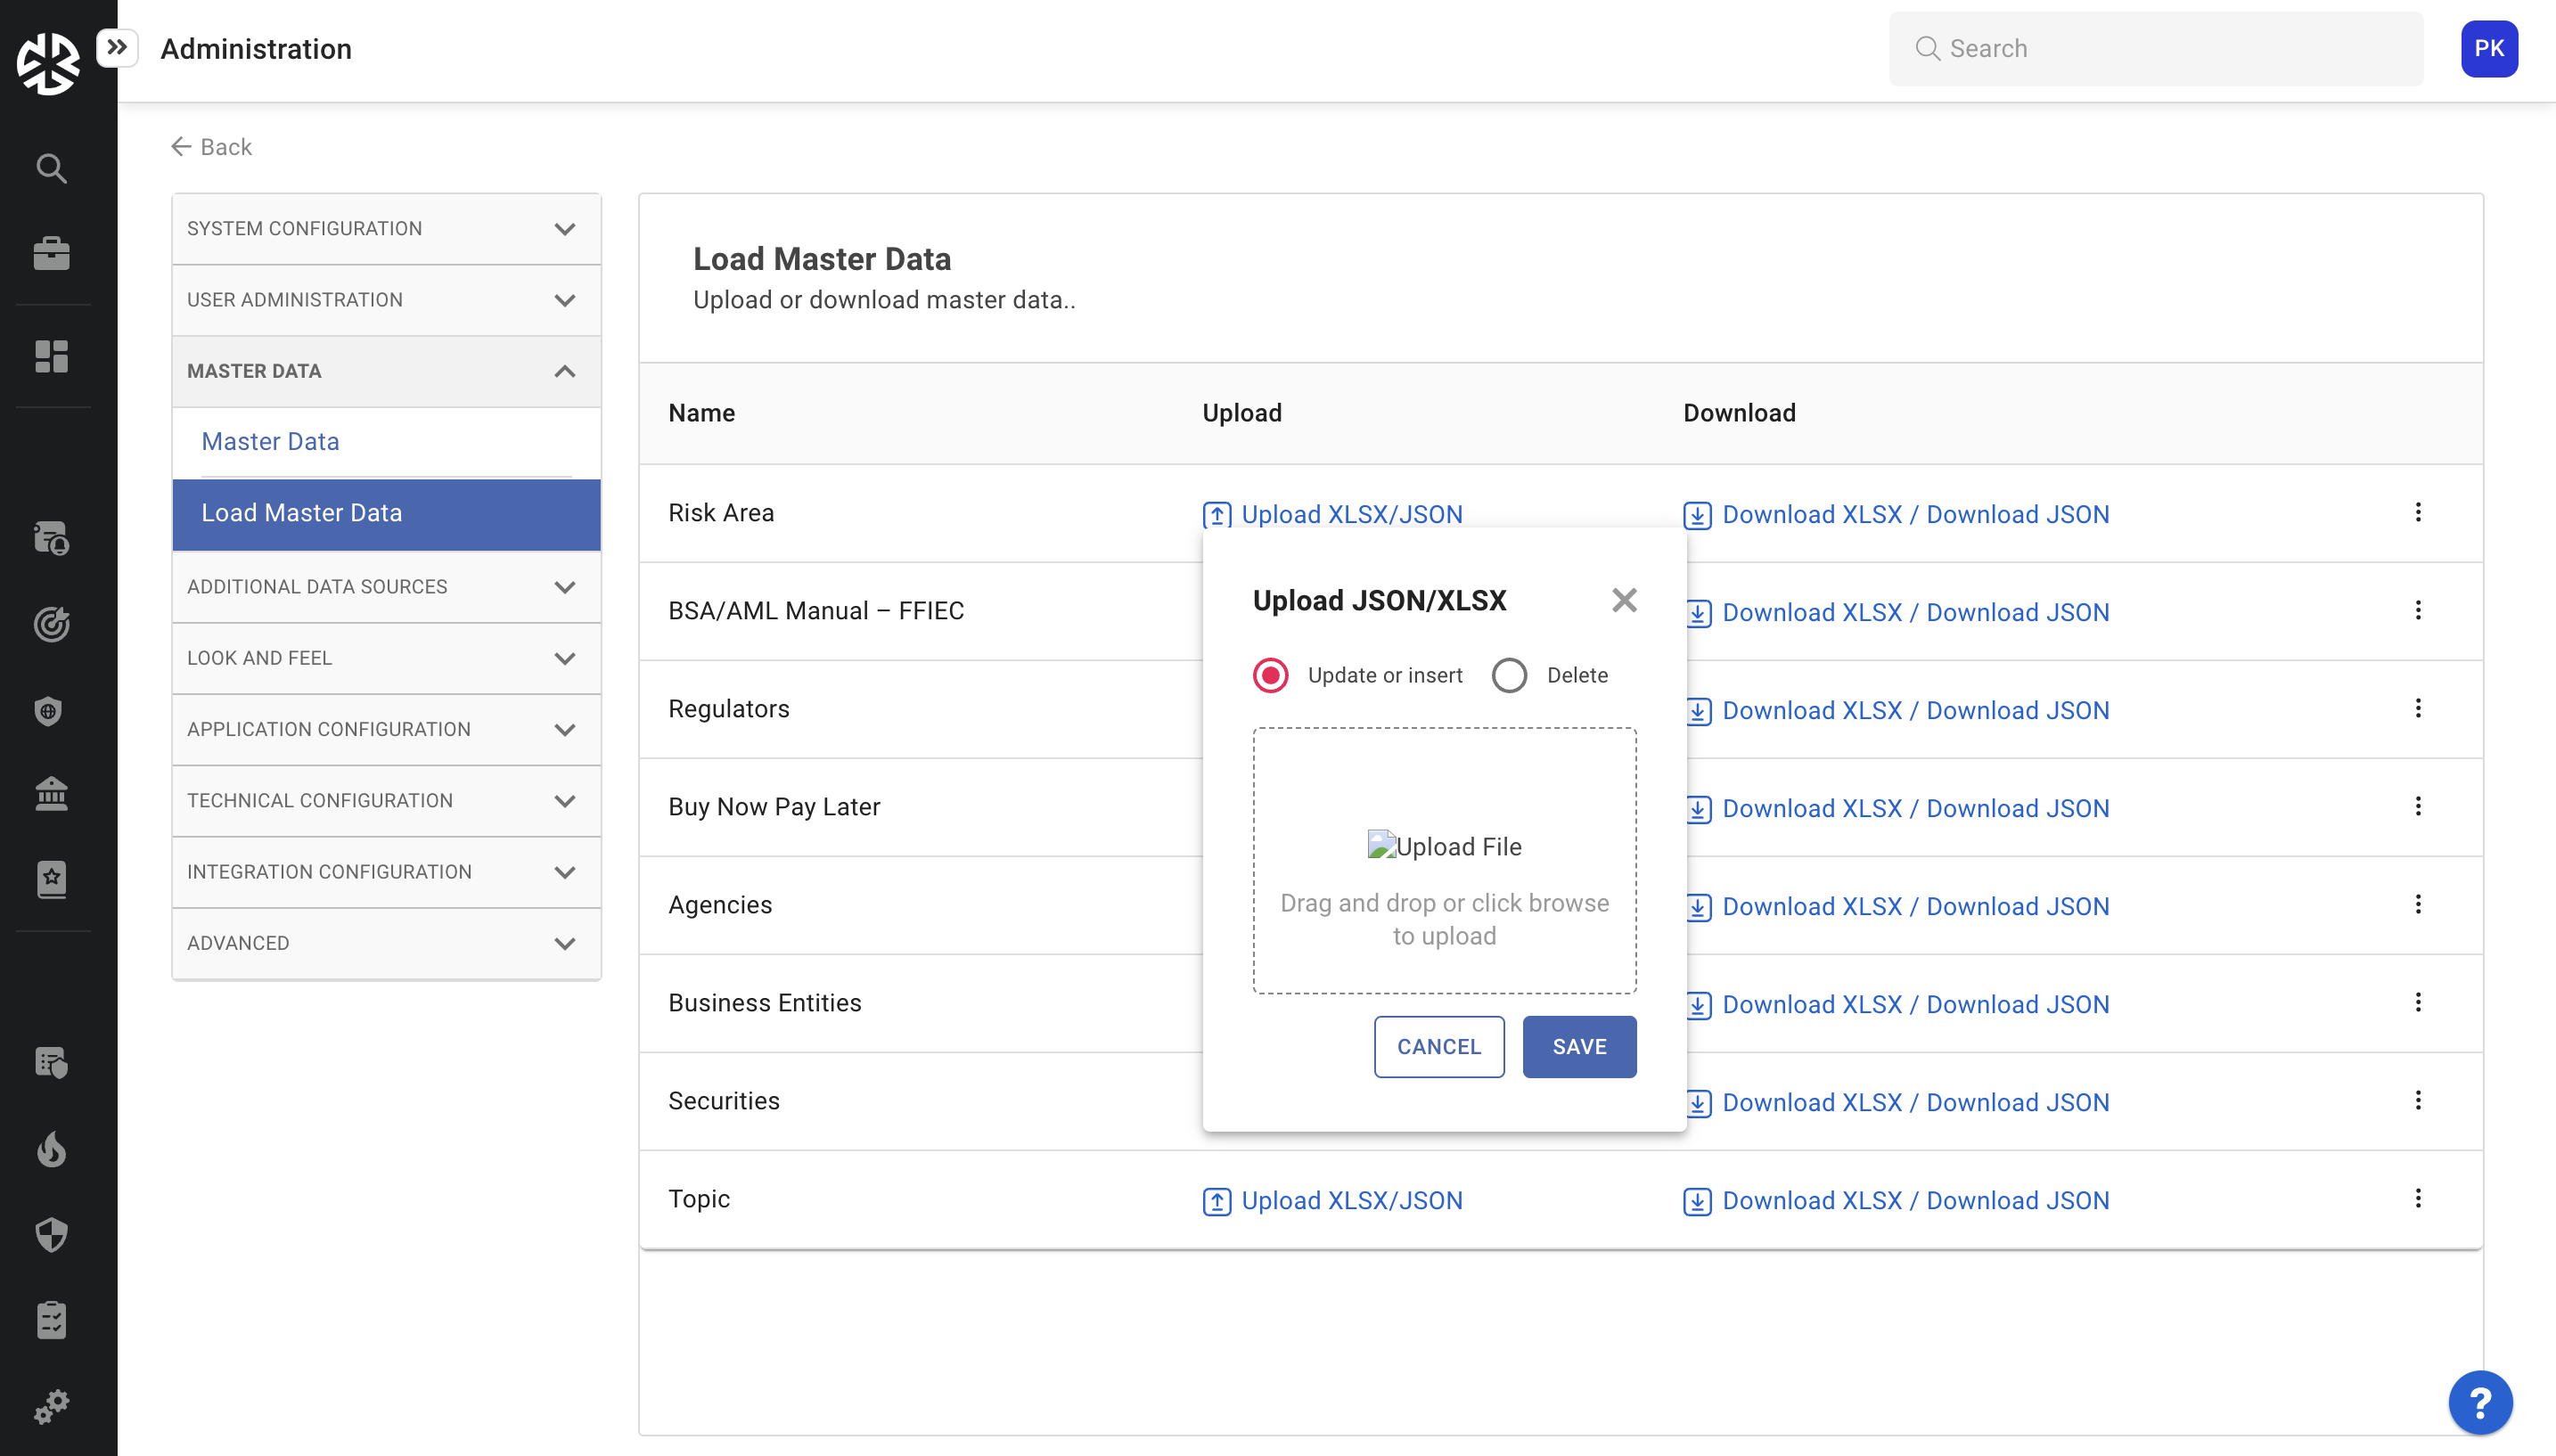
Select Delete to delete existing master data matching the data in the uploaded file.
Drag and drop the JSON/XLSX file for the master data in the field provided.
You can click Cancel at any time to discard any unsaved changes.
Click Save.
Downloading Master Data
To download master data:
Click the Download XLSX/JSON link corresponding to the required master data type.
The master data is saved as an Excel file with the specified fields.