System Configuration
Overview
The System Configuration section in Regology allows administrators to manage various settings that impact how users interact with the platform. This guide provides step-by-step instructions to configure system settings efficiently.
Accessing System Configuration
Navigate to the System Configuration section in the platform.
Expand the menu to view the available configuration options.
The System Configuration section includes the following settings:
Primary Scenario
Jurisdiction
Advanced Settings
Alerts Settings
Reggi Settings
Primary Scenario Configuration
The Primary Scenario section allows administrators to enable specific operations for users.
Steps to Configure
Click Primary Scenario from the expanded System Configuration menu.
The Primary Scenario page displays a list of features and functionalities available for activation.
Select the checkboxes for the features you want to enable.
Click Save to apply changes and proceed to the next step.
Depending on the selected configuration, the system may redirect you to an additional settings page. Review and update these settings as needed, then click Save to confirm.
Jurisdiction Configuration
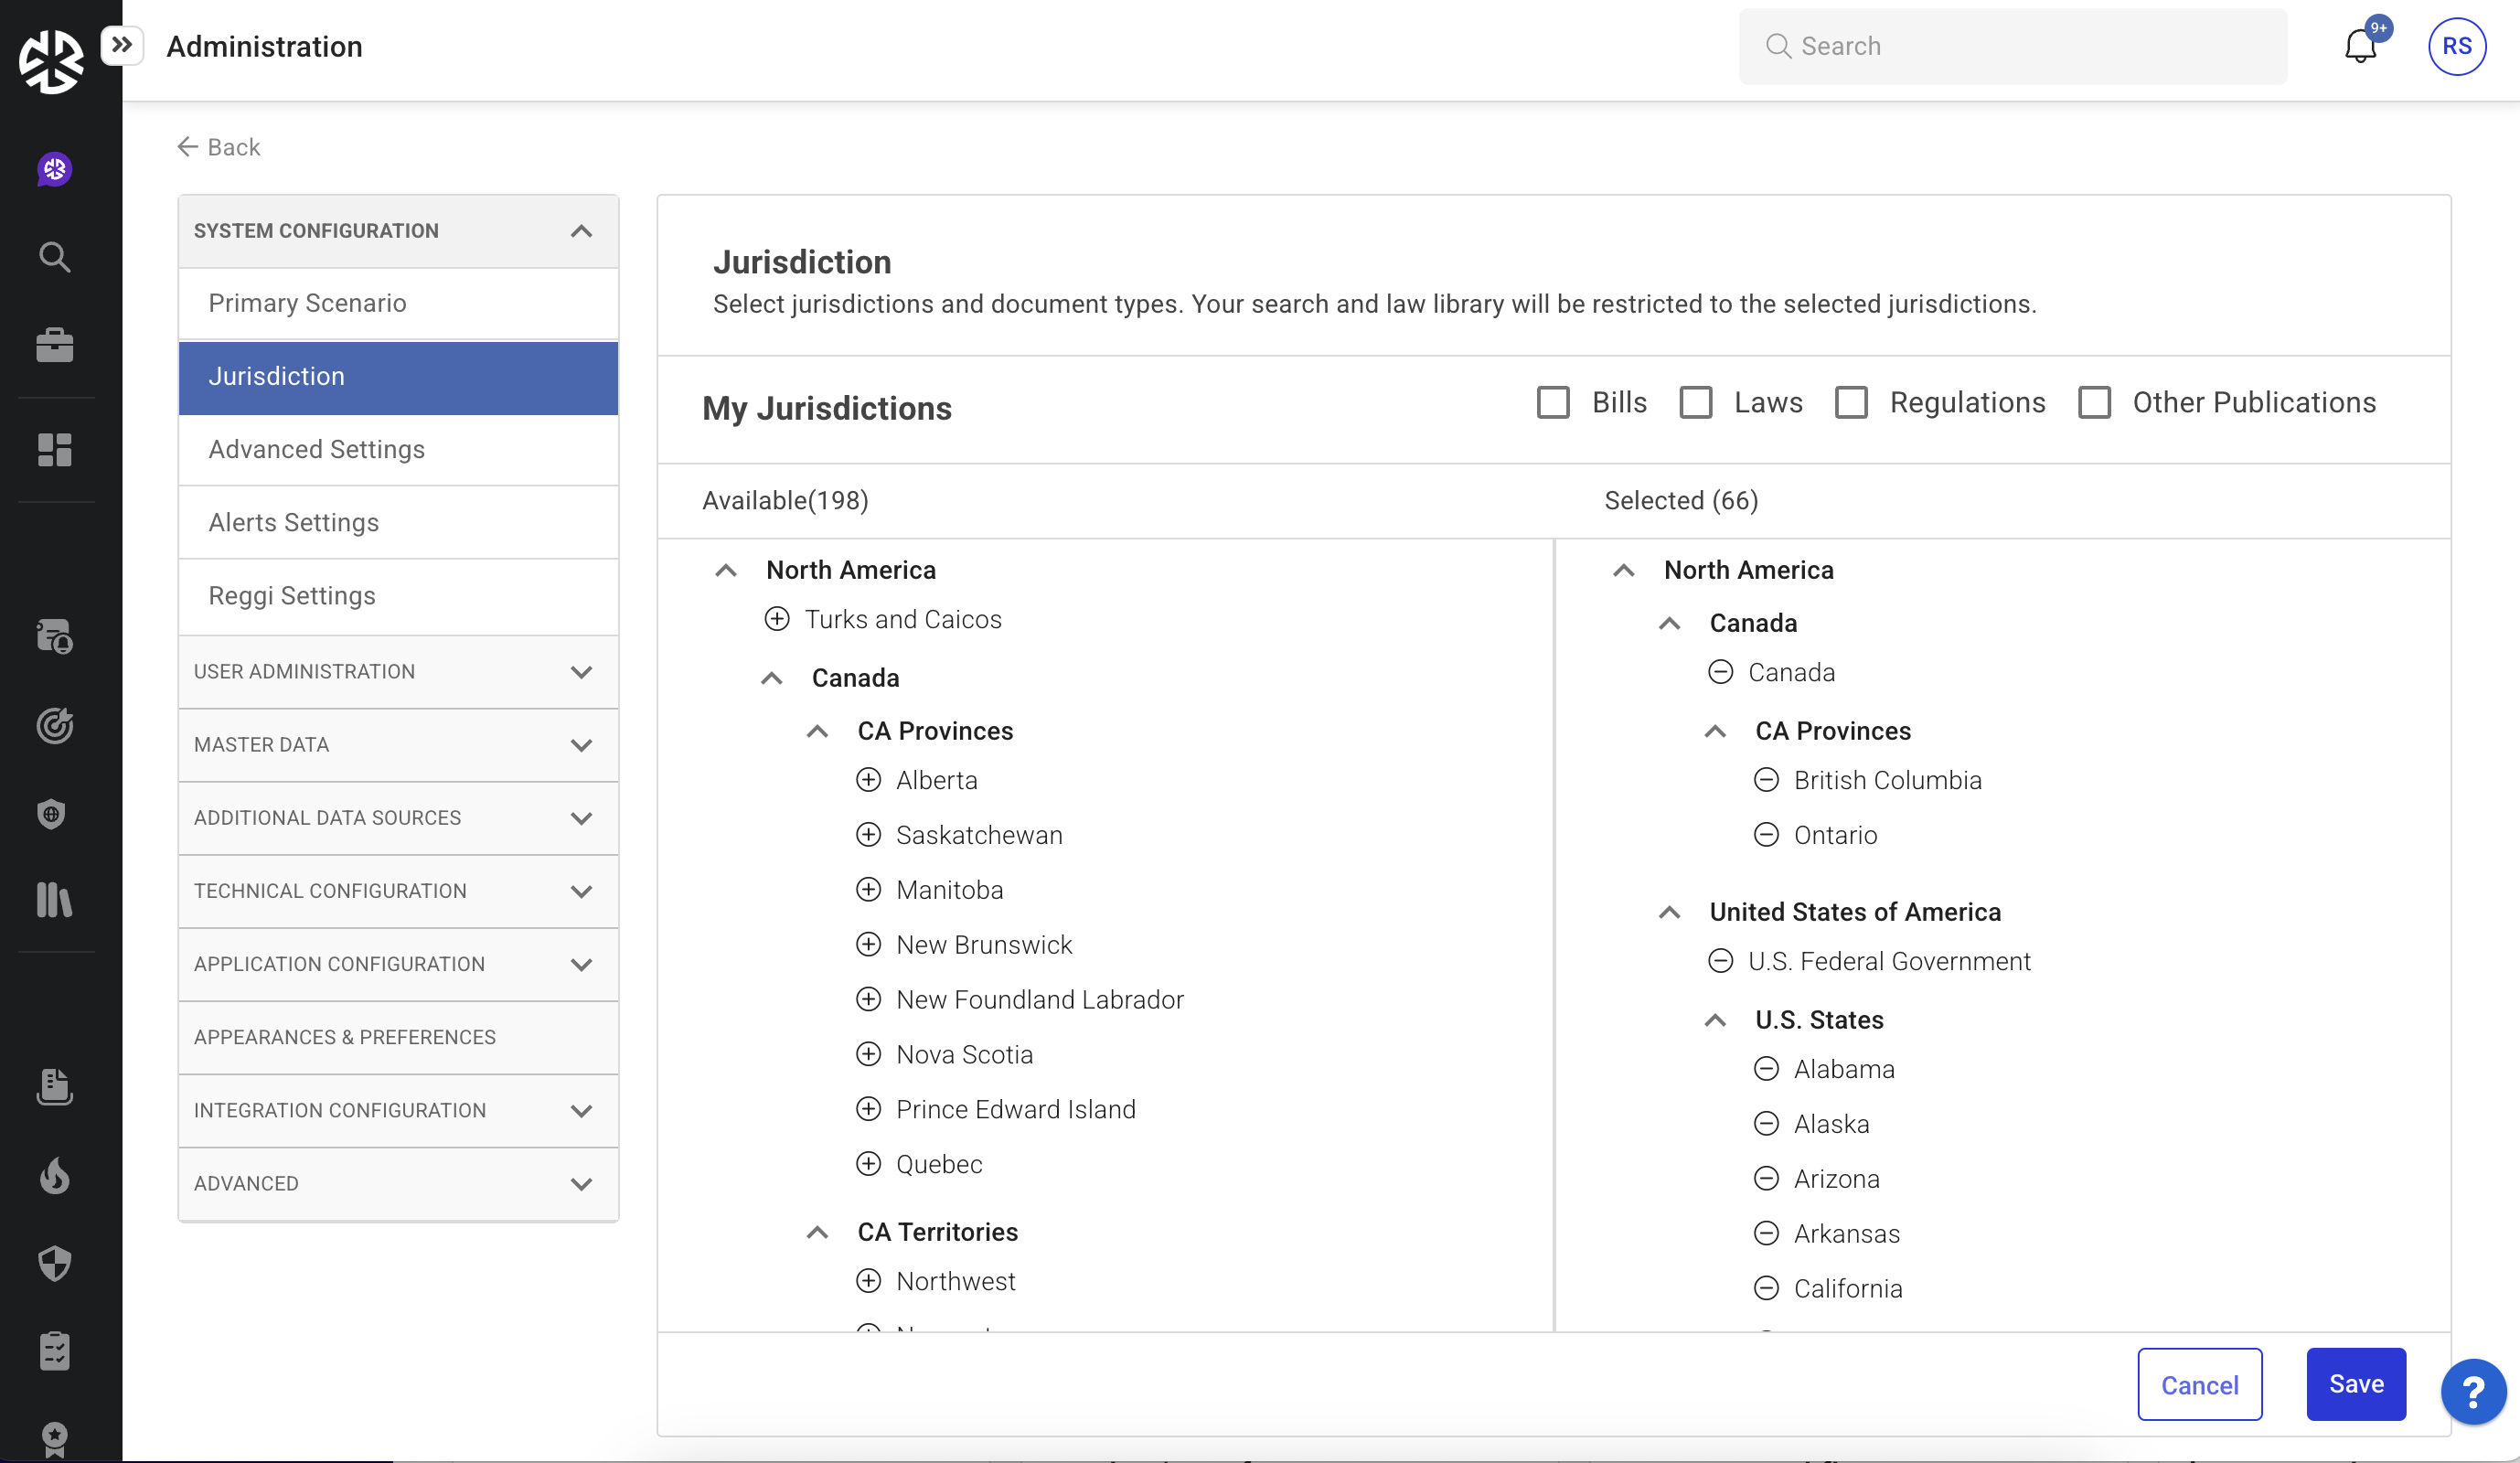
The Jurisdiction section allows administrators to define document types and jurisdictions within the system.

Steps to Configure
Expand System Configuration and click Jurisdiction.
The Jurisdiction page displays a list of available document types: Bills, Laws, Regulations, and Other Publications.
Select the document types to include in your jurisdiction.
To add a jurisdiction:
Locate the jurisdiction in the Available list.
Click the plus (+) icon next to it. The jurisdiction moves to the Selected list.
To remove a jurisdiction:
Locate it in the Selected list.
Click the minus (-) icon next to it. The jurisdiction moves back to the Available list.
Click Save to apply changes.
Based on your settings, you may be redirected to the Advanced Settings page. Review and update the settings as required.
Advanced Settings Configuration
The Advanced Settings section allows users to select corpuses, agencies, and feeds relevant to their jurisdictions.
Configuring Corpora
Click Advanced Settings from the System Configuration menu.
To include all corpuses, click Select All in the Corpus column.
To include specific corpuses:
Click the number under the Corpus column for a jurisdiction.
In the Jurisdiction: Corpus modal, locate and add corpuses using the plus (+) icon.
To clear all corpuses, click Remove All in the Corpus column.
Remove corpuses using the minus (-) icon.
Click Done to save selections.
Configuring Agencies
Click the number in the Agency column for a jurisdiction.
In the Jurisdiction: Agency modal, locate and add agencies using the plus (+) icon.
Remove agencies using the minus (-) icon.
Use Select All to select multiple agencies and Remove All to clear selections.
Click Done to apply changes.
Configuring Feeds
Click the number in the Feeds column for a jurisdiction.
In the Jurisdiction: Feed modal, locate and add feeds using the plus (+) icon.
Remove feeds using the minus (-) icon.
Use Select All to select multiple feed and Remove All to clear selections.
Click Done to save changes.
Click Save to finalize all updates.
Alerts Settings
The Alerts Settings section enables administrators to define alert rules and configurations for the account.

Steps to Configure
Navigate to Alerts Settings in the System Configuration menu.
The Alerts Settings page consists of multiple configuration tabs:
Alert Grouping: Choose criteria for grouping alerts (e.g., Jurisdiction, Agency, Master Data Types).
Refinement Rules: Define filtering conditions to refine alerts.
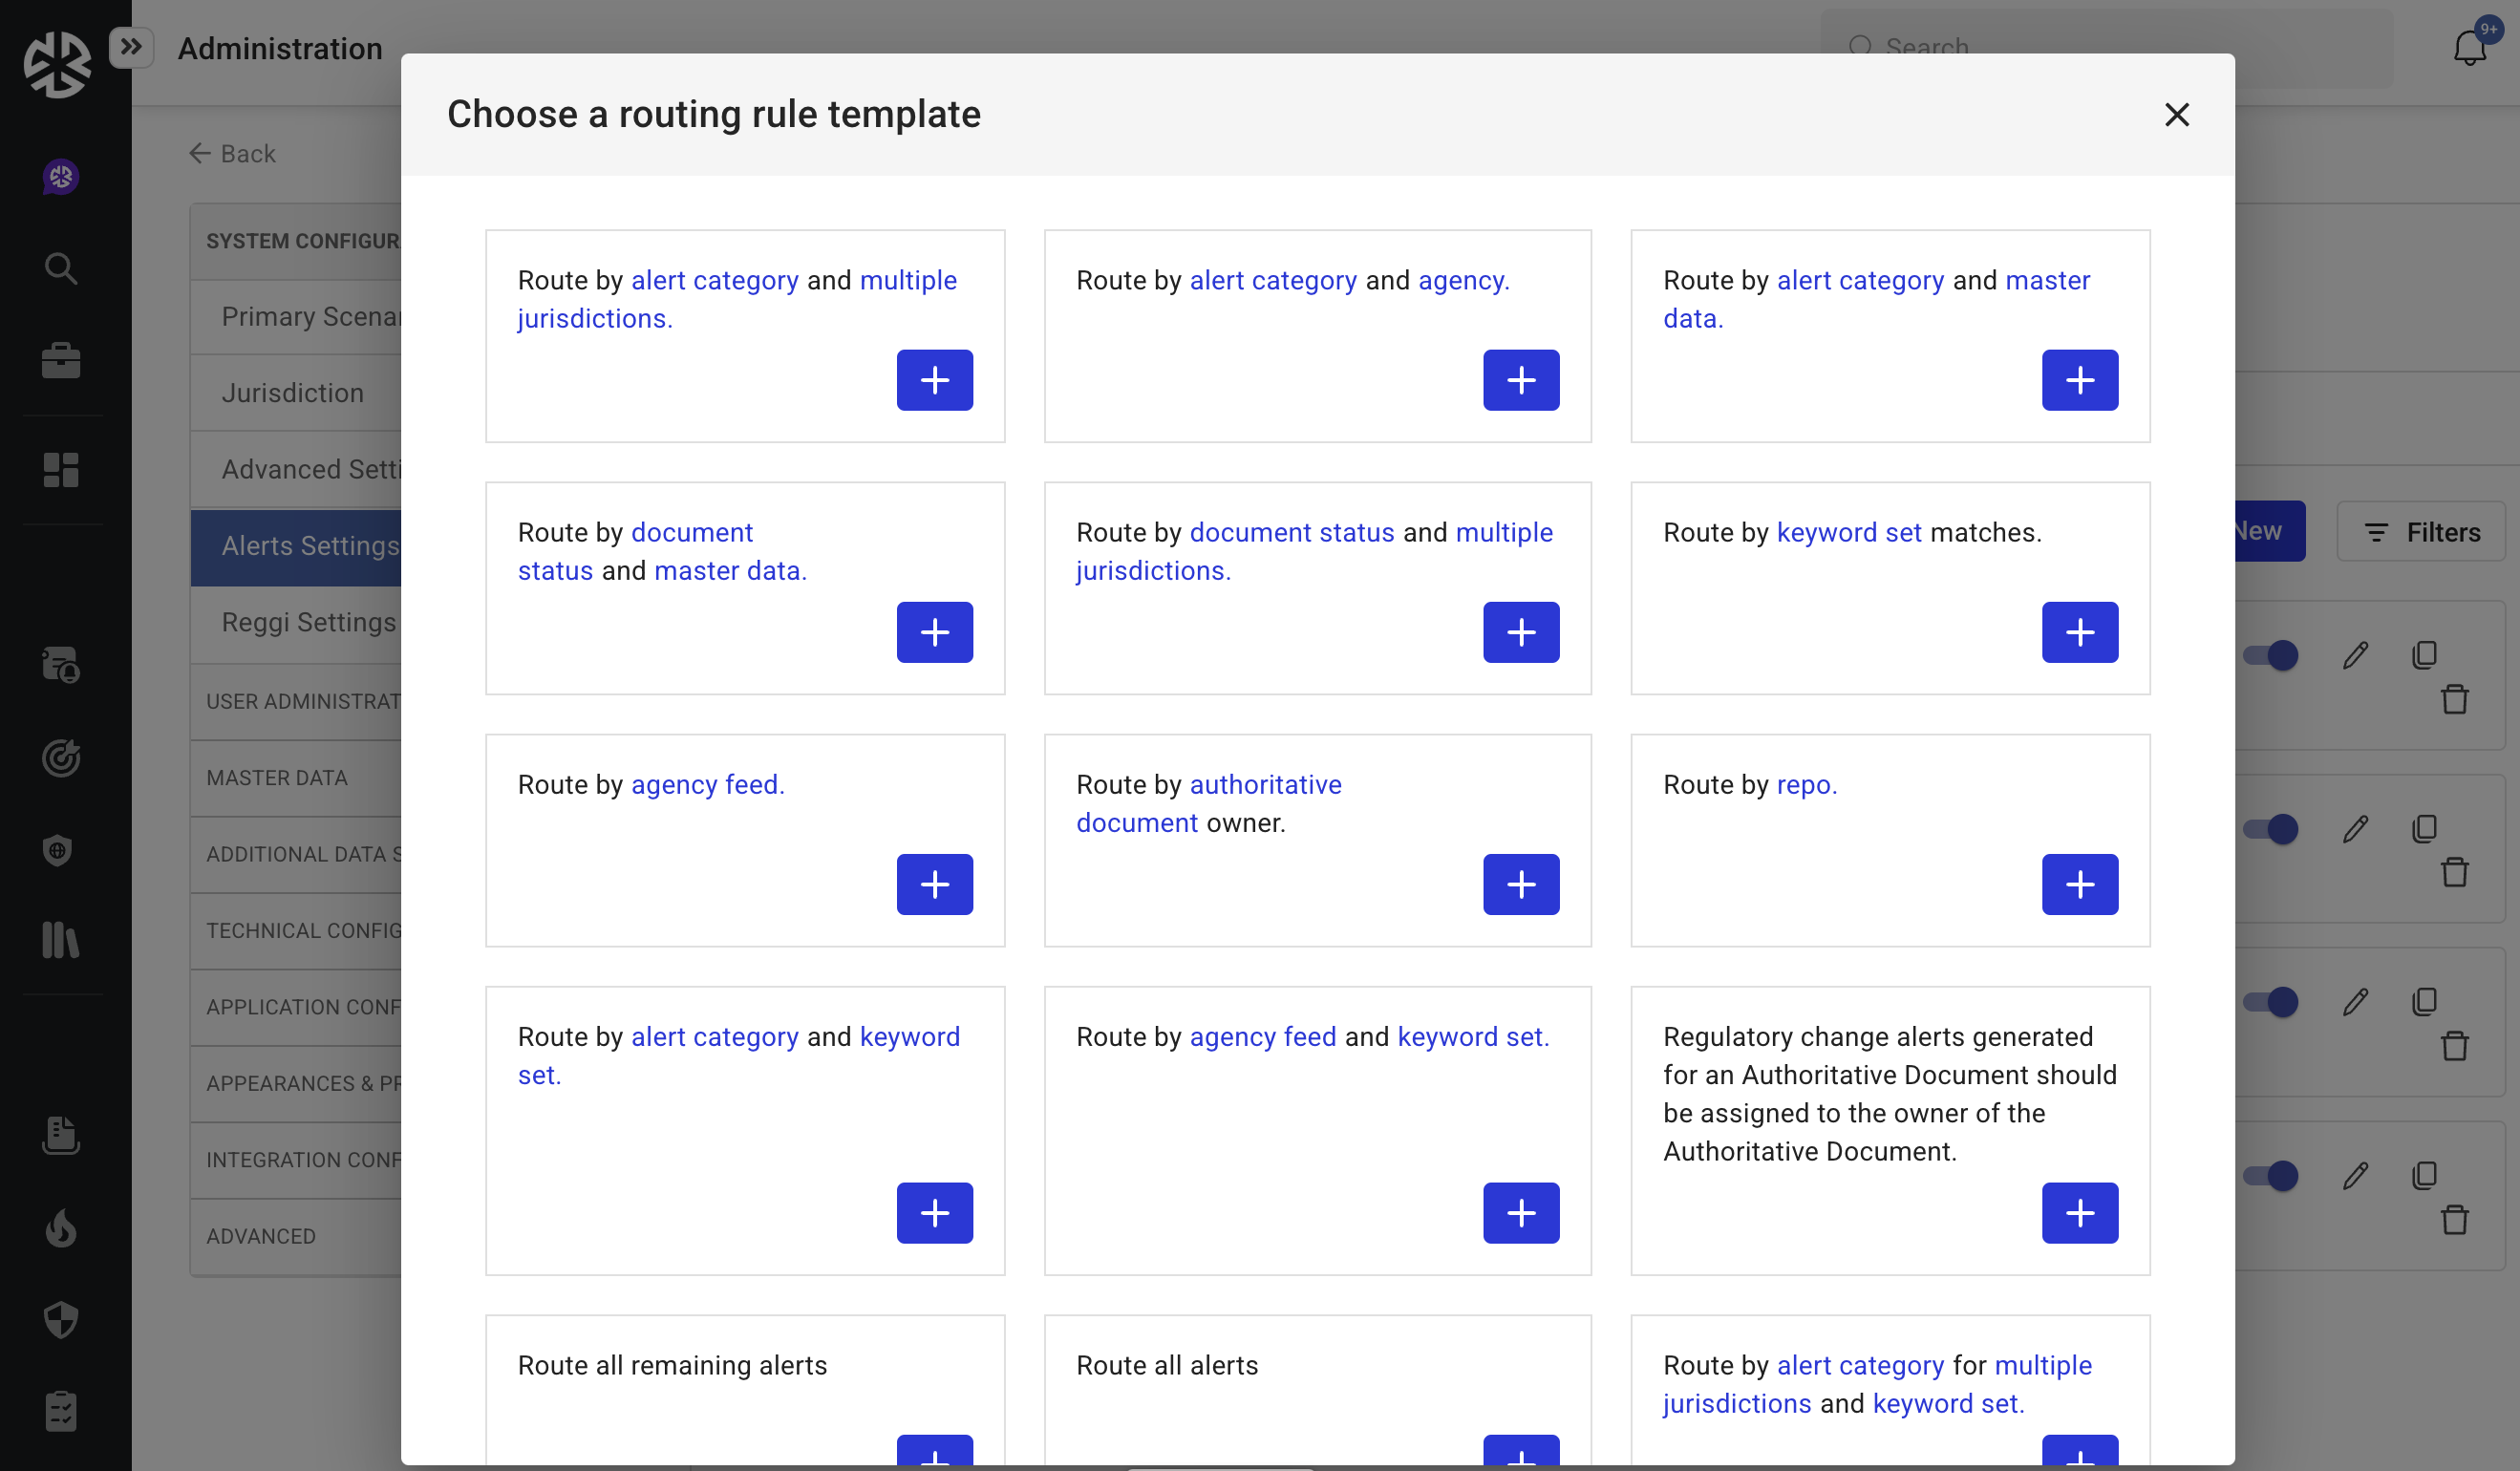
Routing Rules: Set up rules to direct alerts to relevant users or teams.
Archiving Rules: Establish retention and archival rules for alerts.
Reggi Settings
The Reggi Settings section allows customization of system behavior and automated responses.
Steps to Configure
Navigate to Reggi Settings in the System Configuration menu.
The Reggi Settings page consists of two configuration tabs:
Basic Settings: Enable or disable key Reggi features.
Prompt Customization: Configure AI-generated responses and behavior based on organizational needs.
Adjust the settings as per your organization’s requirements.
On applying changes to the checkbox, you will get a confirmation via a snackbar message.
Prompt Customization
The Prompt Customization tab allows administrators to fine-tune Reggi’s AI-generated responses to align with business needs. Key customization options include:
Company Prompt: Define general topics or areas of interest that the AI should focus on when generating responses. This includes customizing AI-generated document summaries with an additional prompt.
Whom Does It Apply To: Select predefined prompt templates to tailor AI-generated answers based on applicable entities.
Penalties for Non-Compliance: Customize AI responses regarding regulatory penalties by choosing from prompt templates.
Exemptions: Configure AI to provide details on exemptions relevant to regulatory documents, requirements, controls, and policies.
Administrators can adjust these settings by toggling the options and selecting relevant prompts. On applying changes to the toggle, you will get a confirmation via a snackbar message.
By following the outlined steps, users can efficiently configure the platform to meet their needs. For further assistance, contact the Regology support team.
