
Creating Controls
Creating Controls from the Control List view
Click Controls in the main menu. The Controls page appears.
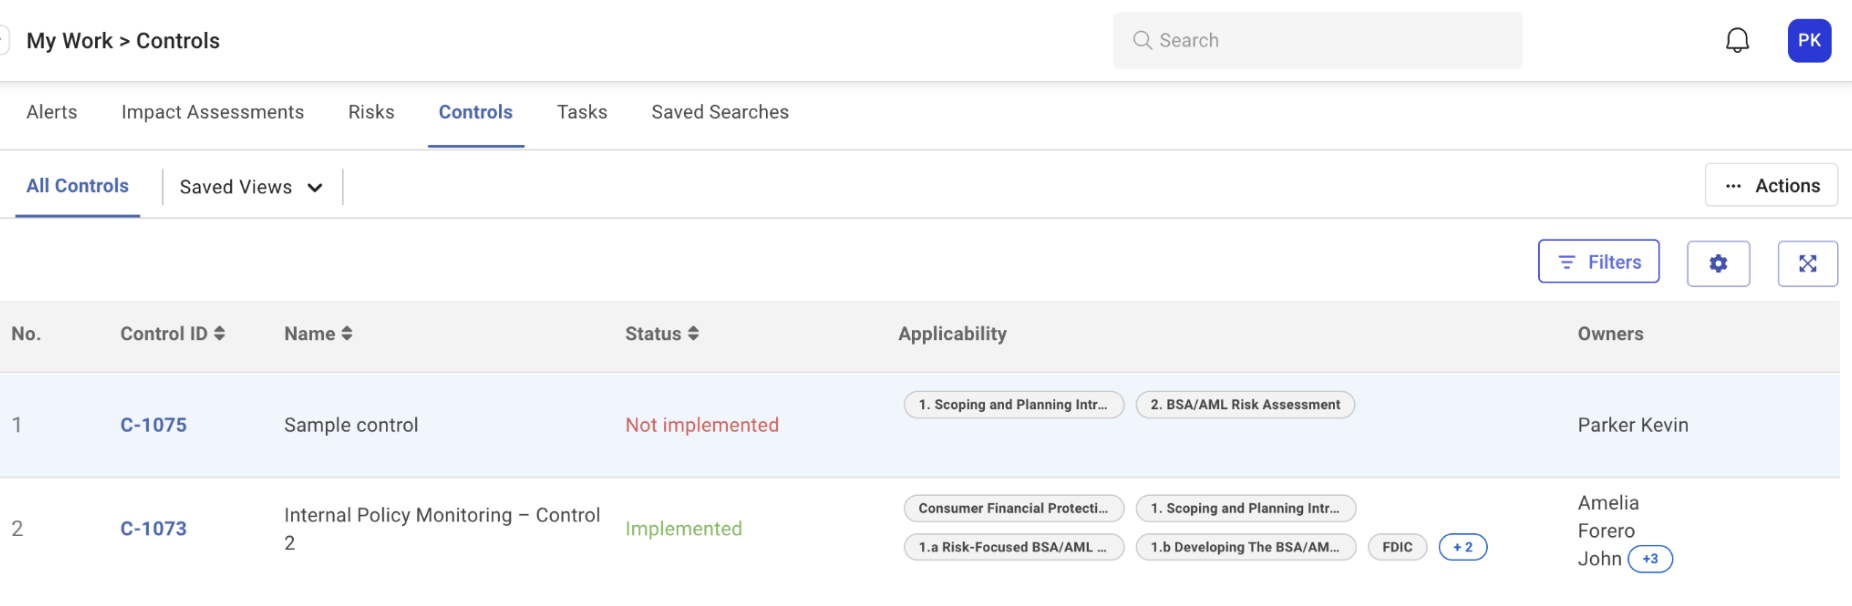
Click the Add Control icon in the top-right section of the page.
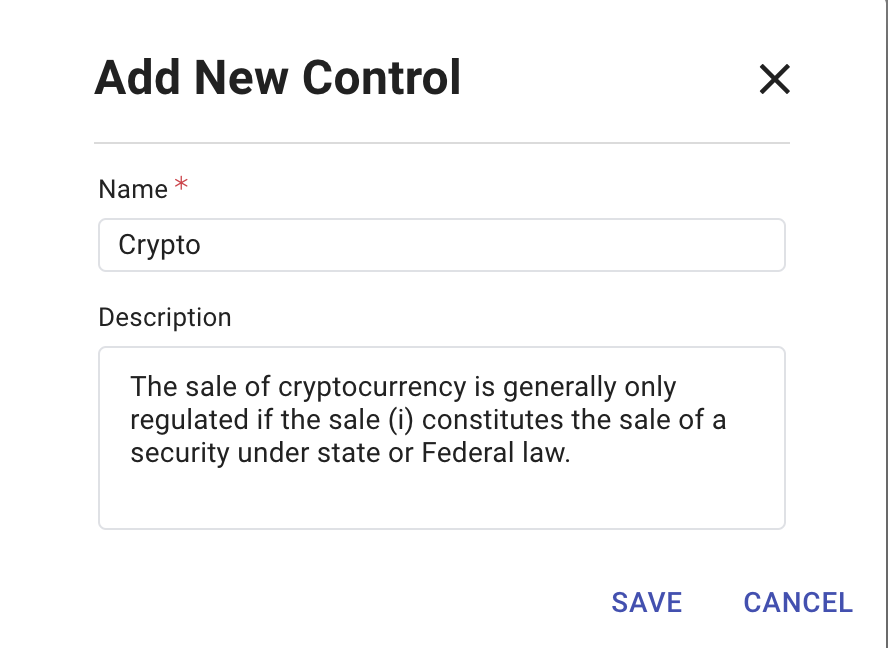
The Add New Control modal appears.Enter a Name and Description for the control.
Click Save.
The system creates the control, and the Control Details page appears.
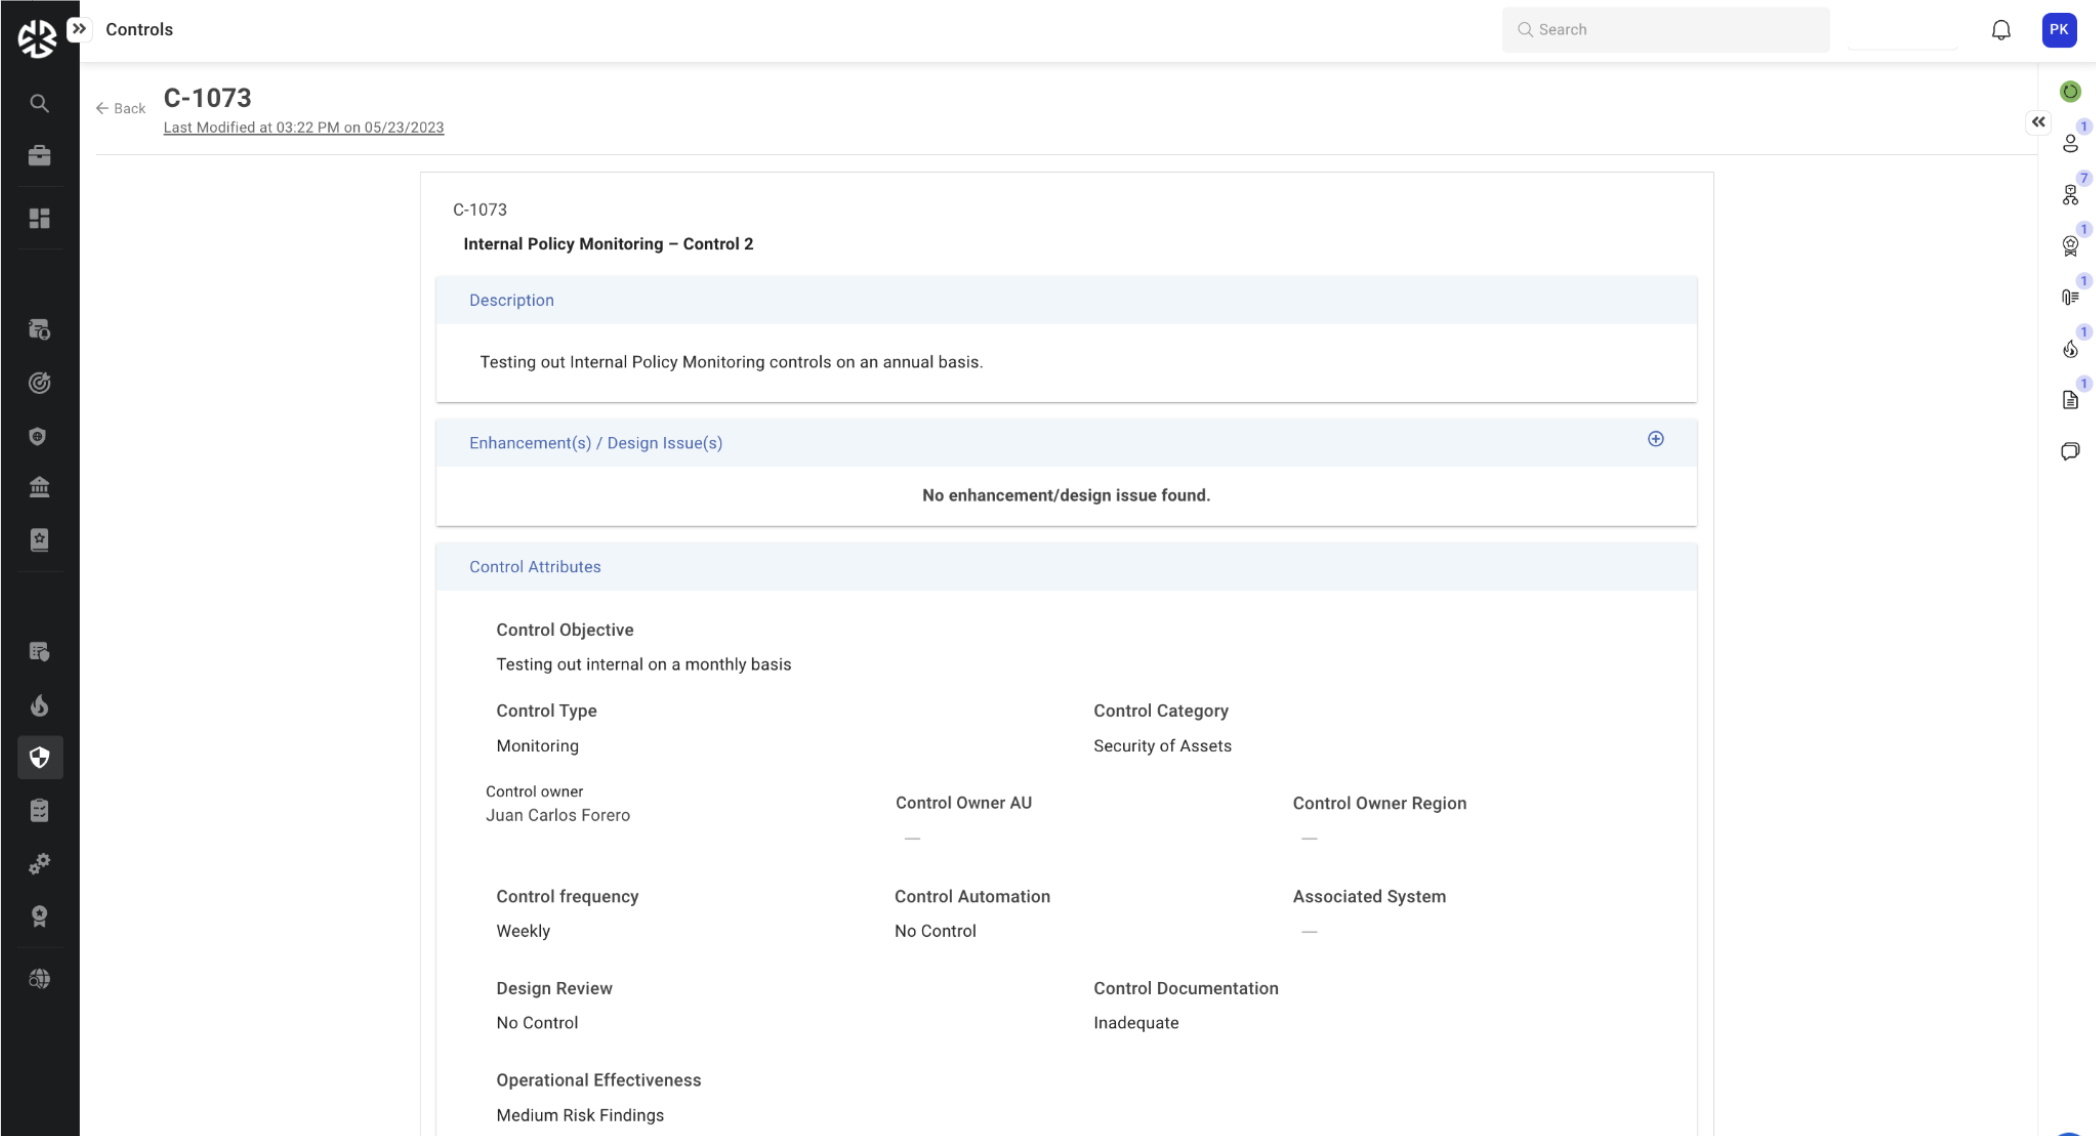
Verify and update the Name and Description of the control as required.
Use the Create icon at the right end of the Enhancement(s) / Design Issue(s) section to add enhancement tasks associated with the control. The Create Task modal appears.
To select an existing task, click Select an existing task. Use the Assign Task modal that appears to search and assign a task.
<Screenshot of the Assign Task modal>To create a new task:
Enter the Name and Description for the task.
Select a Due Date for the task.
Click the Owner field to assign owners to the control. The application then sends a notification to the individuals to whom you assigned the control, so they can start work on it.
Click Save to create the task, or click Advanced Edit to add further details to the task.
The Gap and Enhancement modal appears.This modal comprises three sections: Summary, Details, and Evidence.
Expand the Summary section and click to edit the Task Name, Status, Owner Name, Description, Due Date, and Reviews.
<Screenshot of the Summary section>Expand the Additional Details section and click to edit the Task Details and to Search stakeholders and applicability.
<Screenshot of the Additional Details section>Expand the Evidence section and upload evidence documents as required.
<Screenshot of the Summary section>Click Close to save your changes and return to the Control Details page.
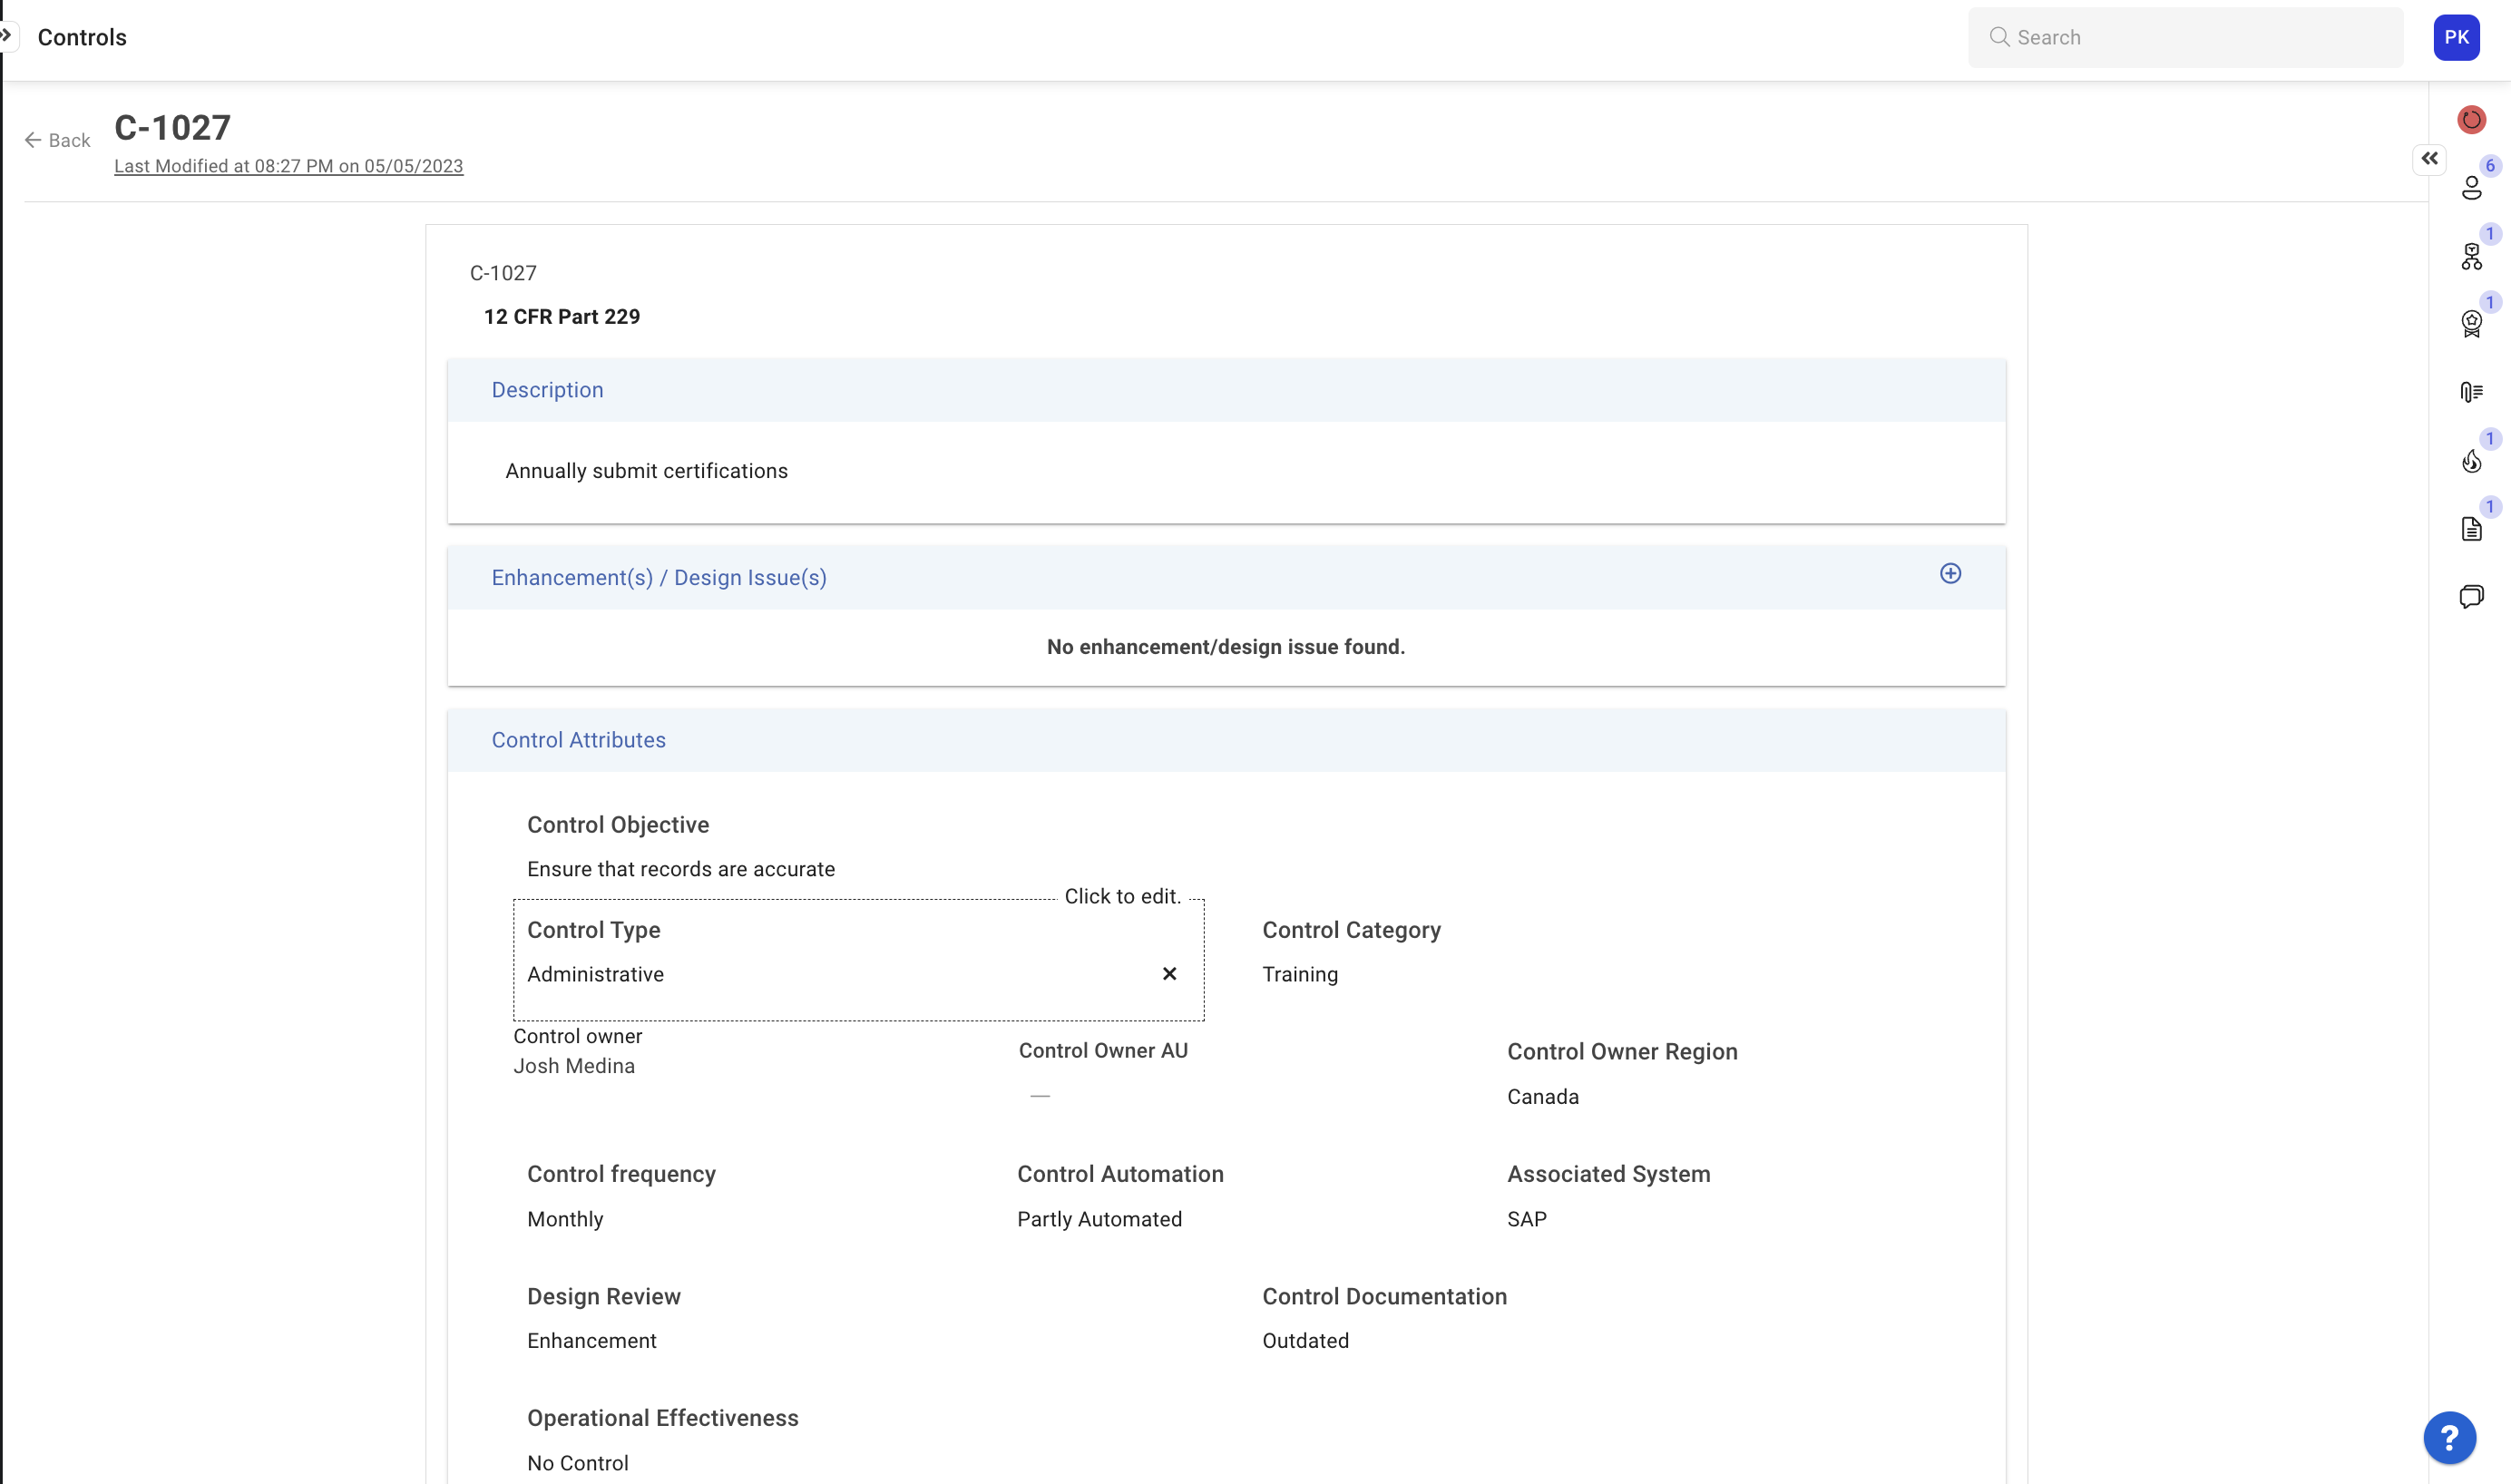
Use the Control Attributes section to update details associated with the control.
Click and provide a Control Objective.
Click to select a Control Type from the options that appear.
Click to select a Control Category.
Use the Control Owner field to search and add an owner to the control.
Note: You can add only one owner to a control.Click the Control Owner AU field to…?
Click to specify the Control Owner Region.
Click to select the Control Frequency.
Use the Control Automation field to specify whether the automation level associated with the control.
Specify the Associated System.
Use the Design Review field to specify whether the control is associated with a design or enhancement issue.
Specify the level of Control Documentation in place using the options provided.
Click to select the Operational Effectiveness of the control.
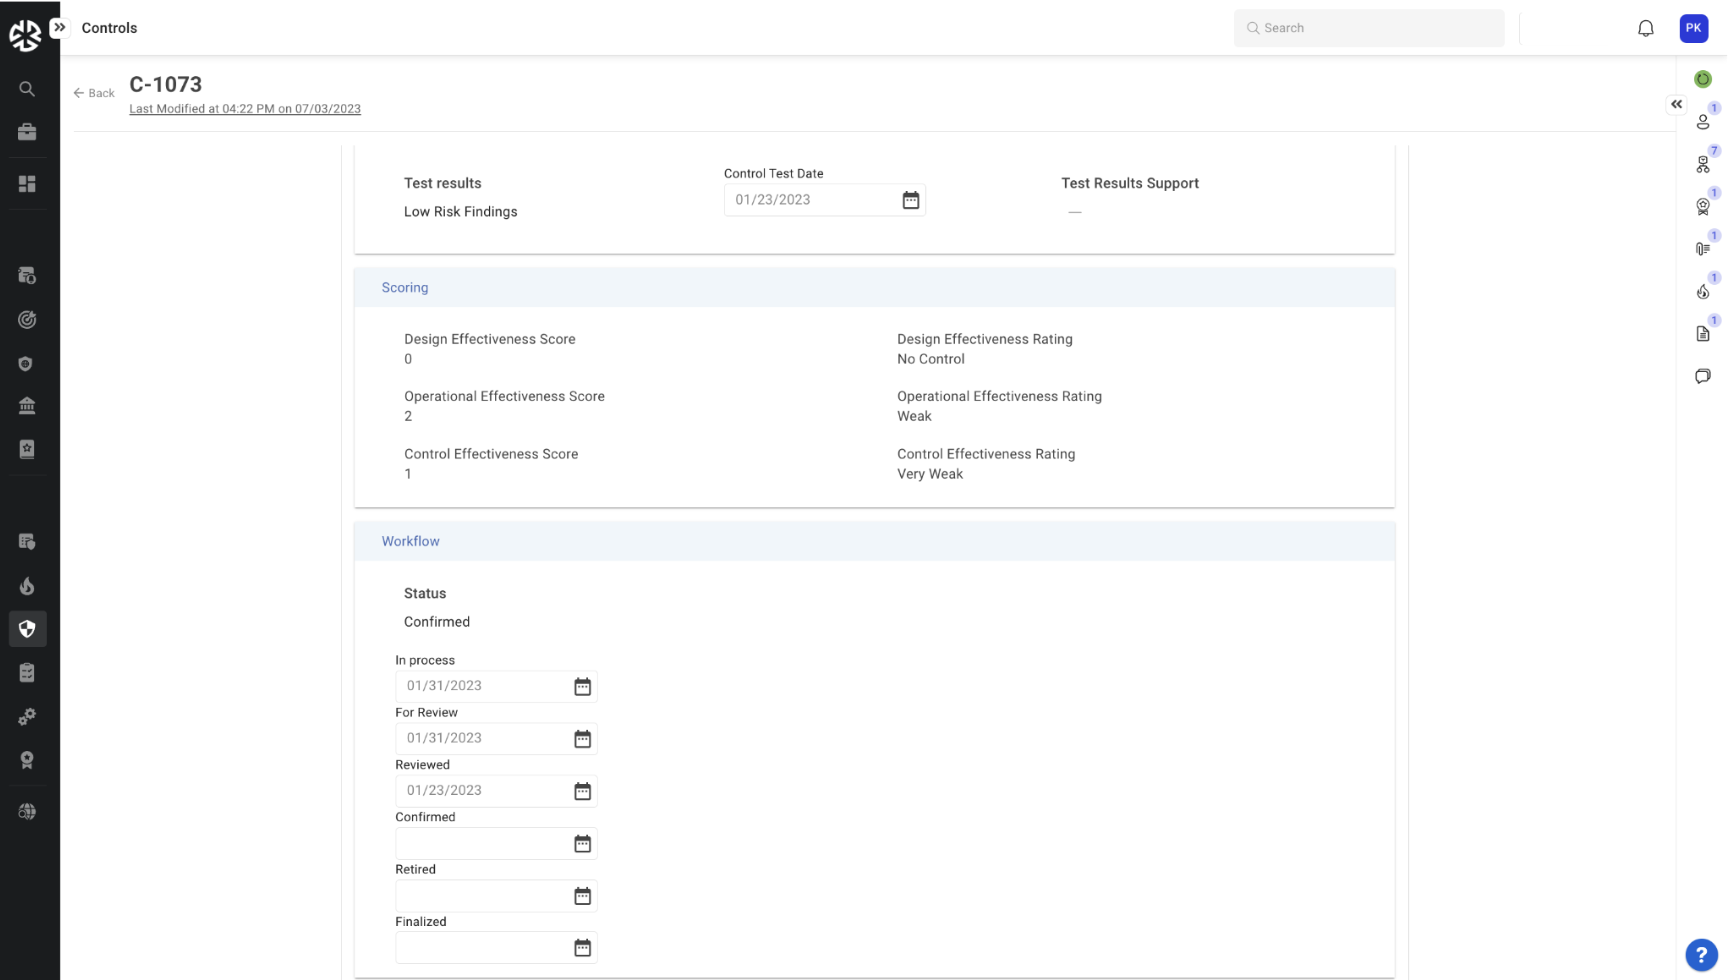
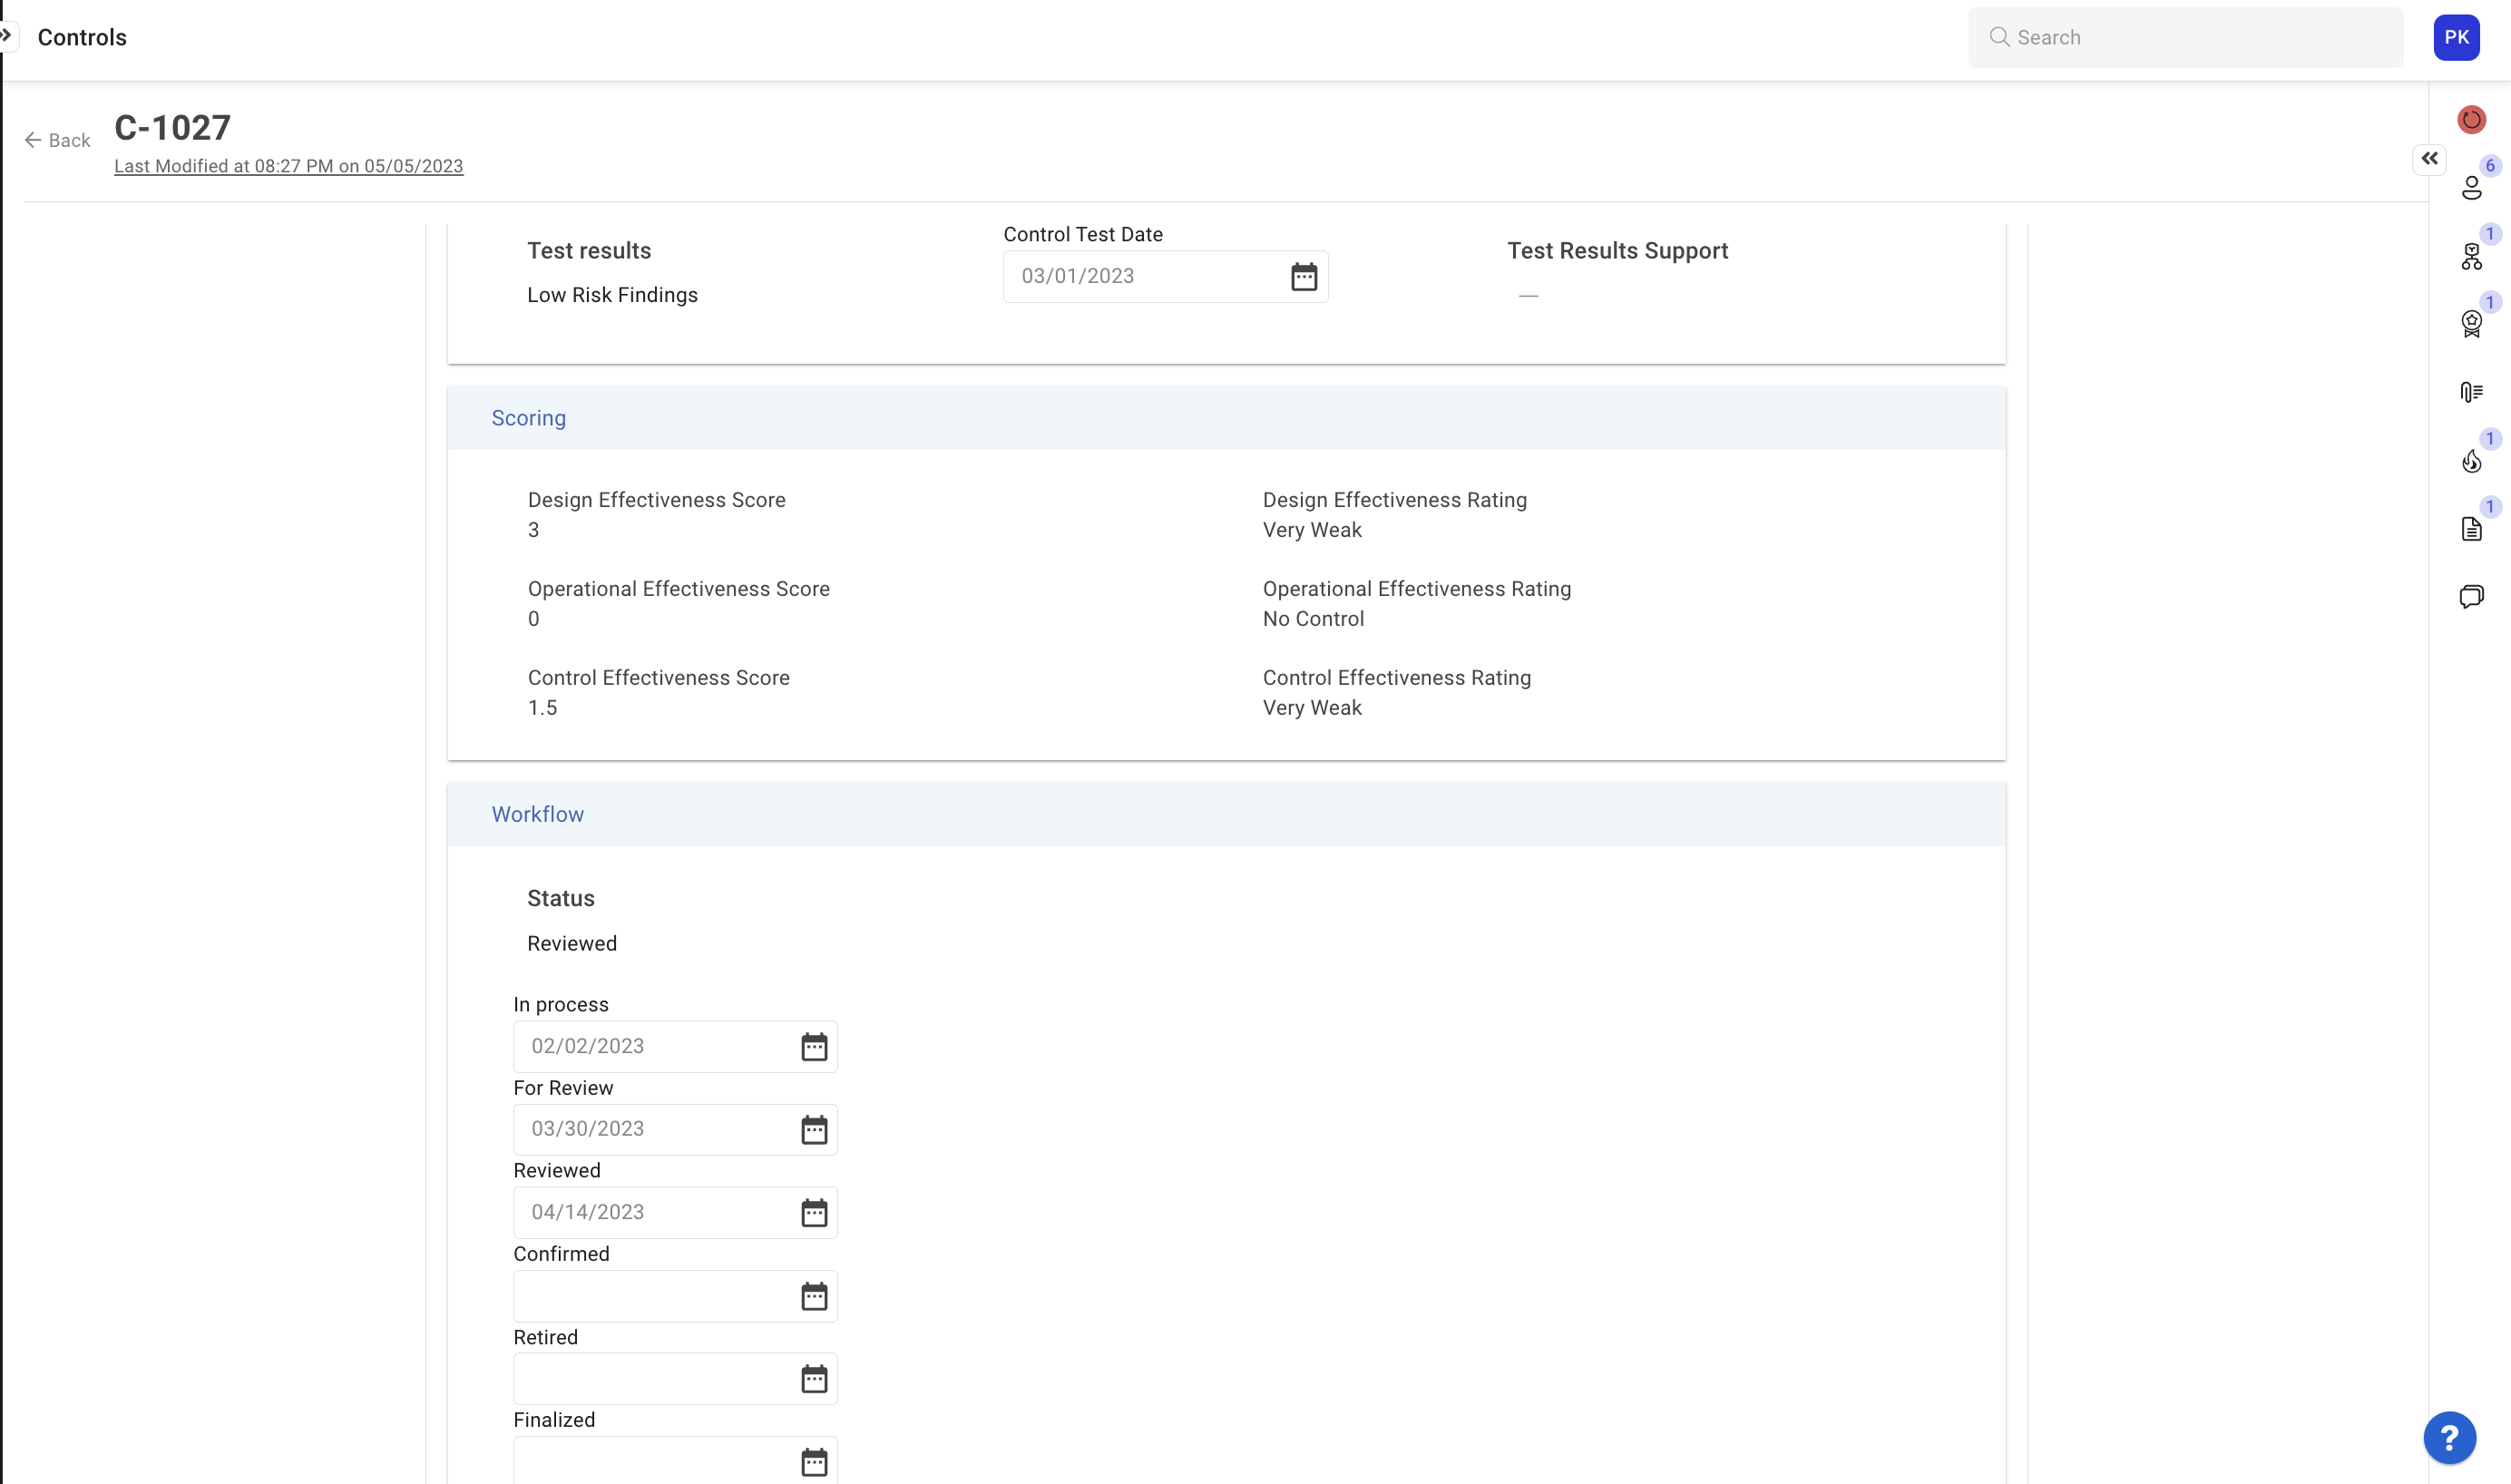
Use the Test Results field to specify the results of the control test.
Provide the Control Test Date.
Enter the email ID of the person who can help with Test Results Support.
Use the Scoring section to review rating scores calculated for the control using the values provided in the Control Attributes section.
Use the Workflow section to provide details associated with the control lifecycle: Update the overall current Status of the control and update dates associated with each stage of the control lifecycle as the control moves across stages.
Click Back to return to the All Controls page.
Creating Controls from the Authoritative Document View
To create controls for an Authoritative Document:
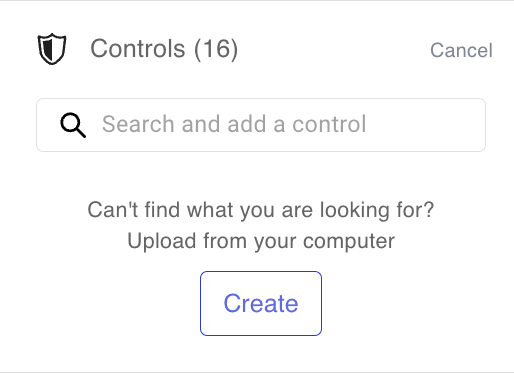
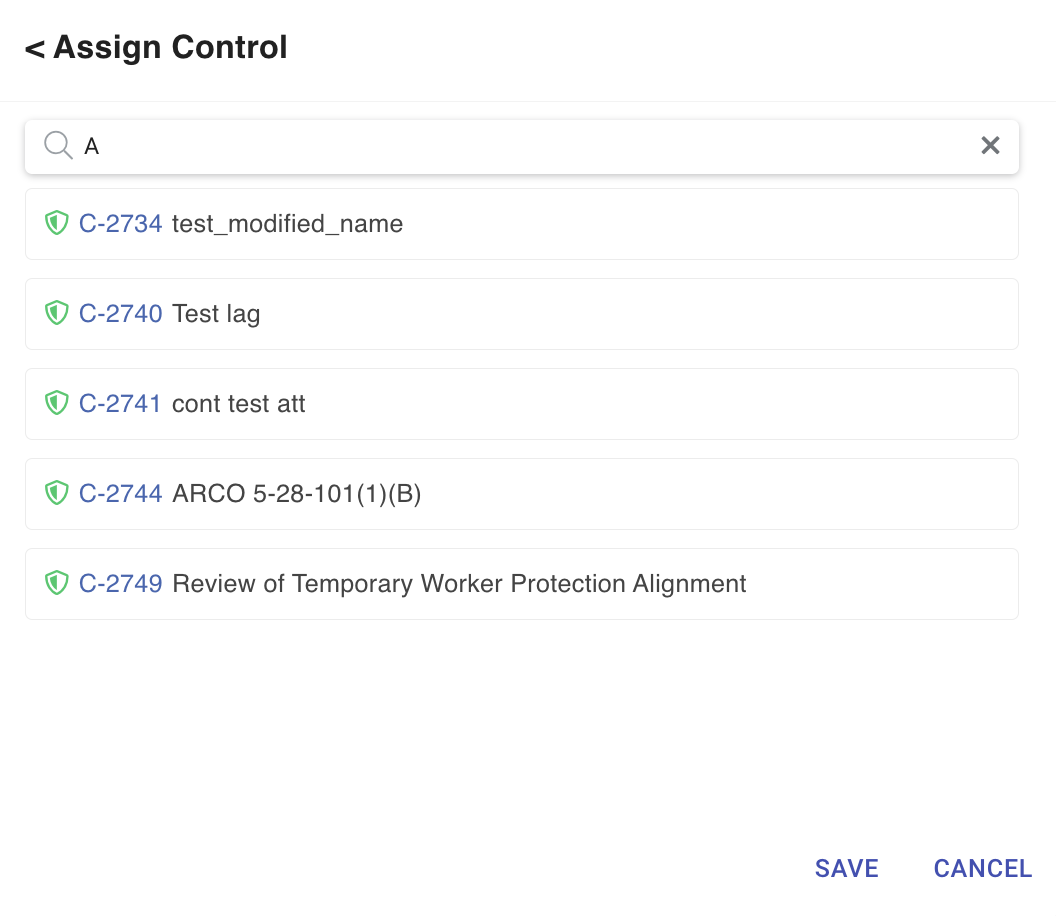
Navigate to the Authoritative Document, click the Control icon in the right-side panel, and click on Assign Control.
Use the Search bar to find and assign an existing control.
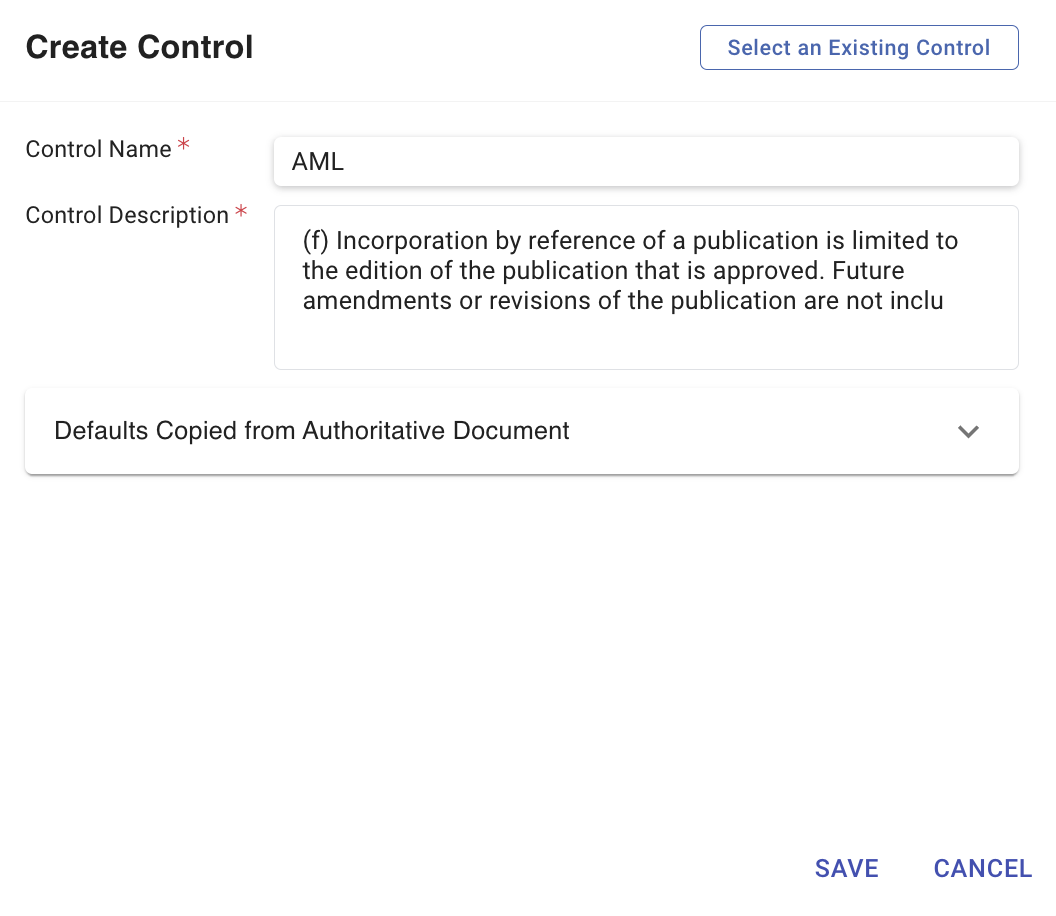
To assign a new control, click Create to create a new control and assign it.
Alternatively, select a section of text in the Authoritative Document and click the Control icon from the menu options that appear.
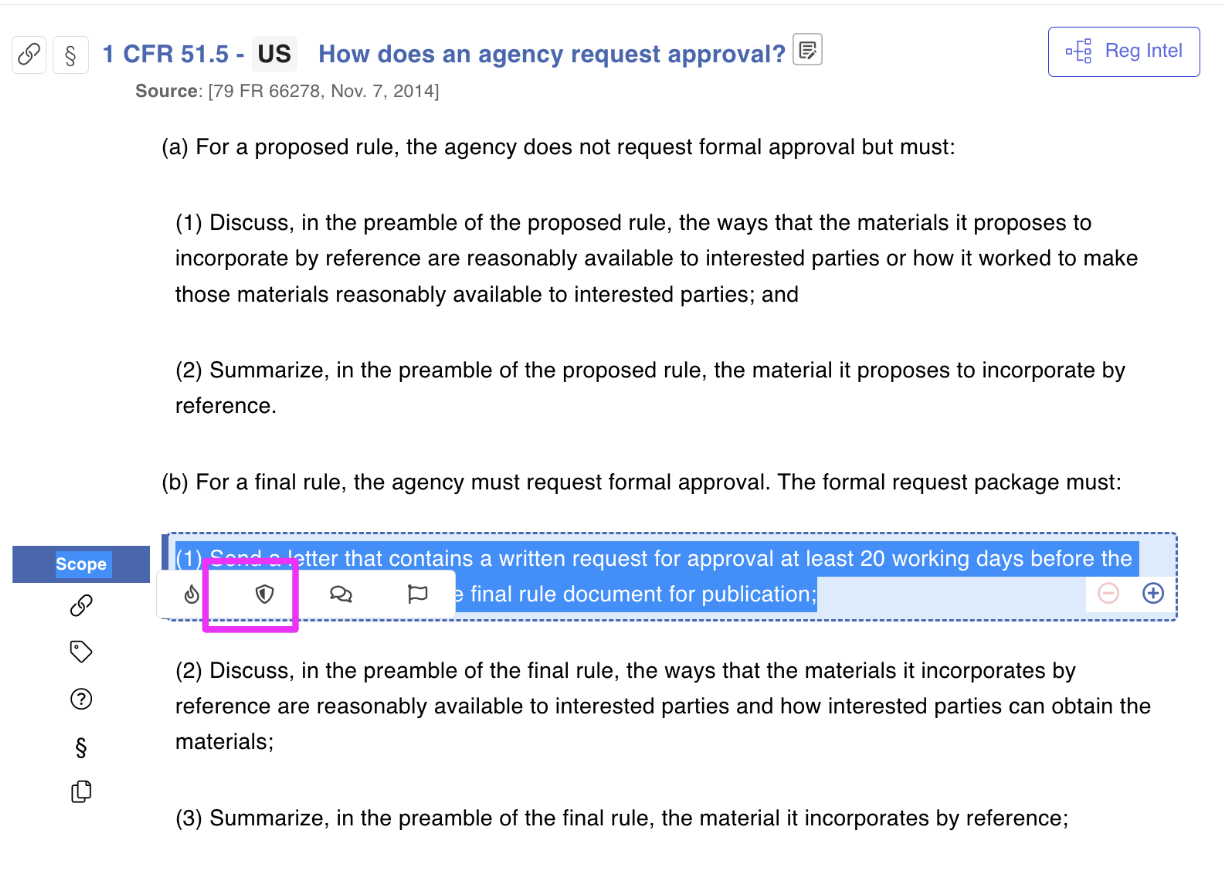
Enter the Control Name and Control Description and click Save.
Alternatively, click on Select an Existing Control.
Click Save.