
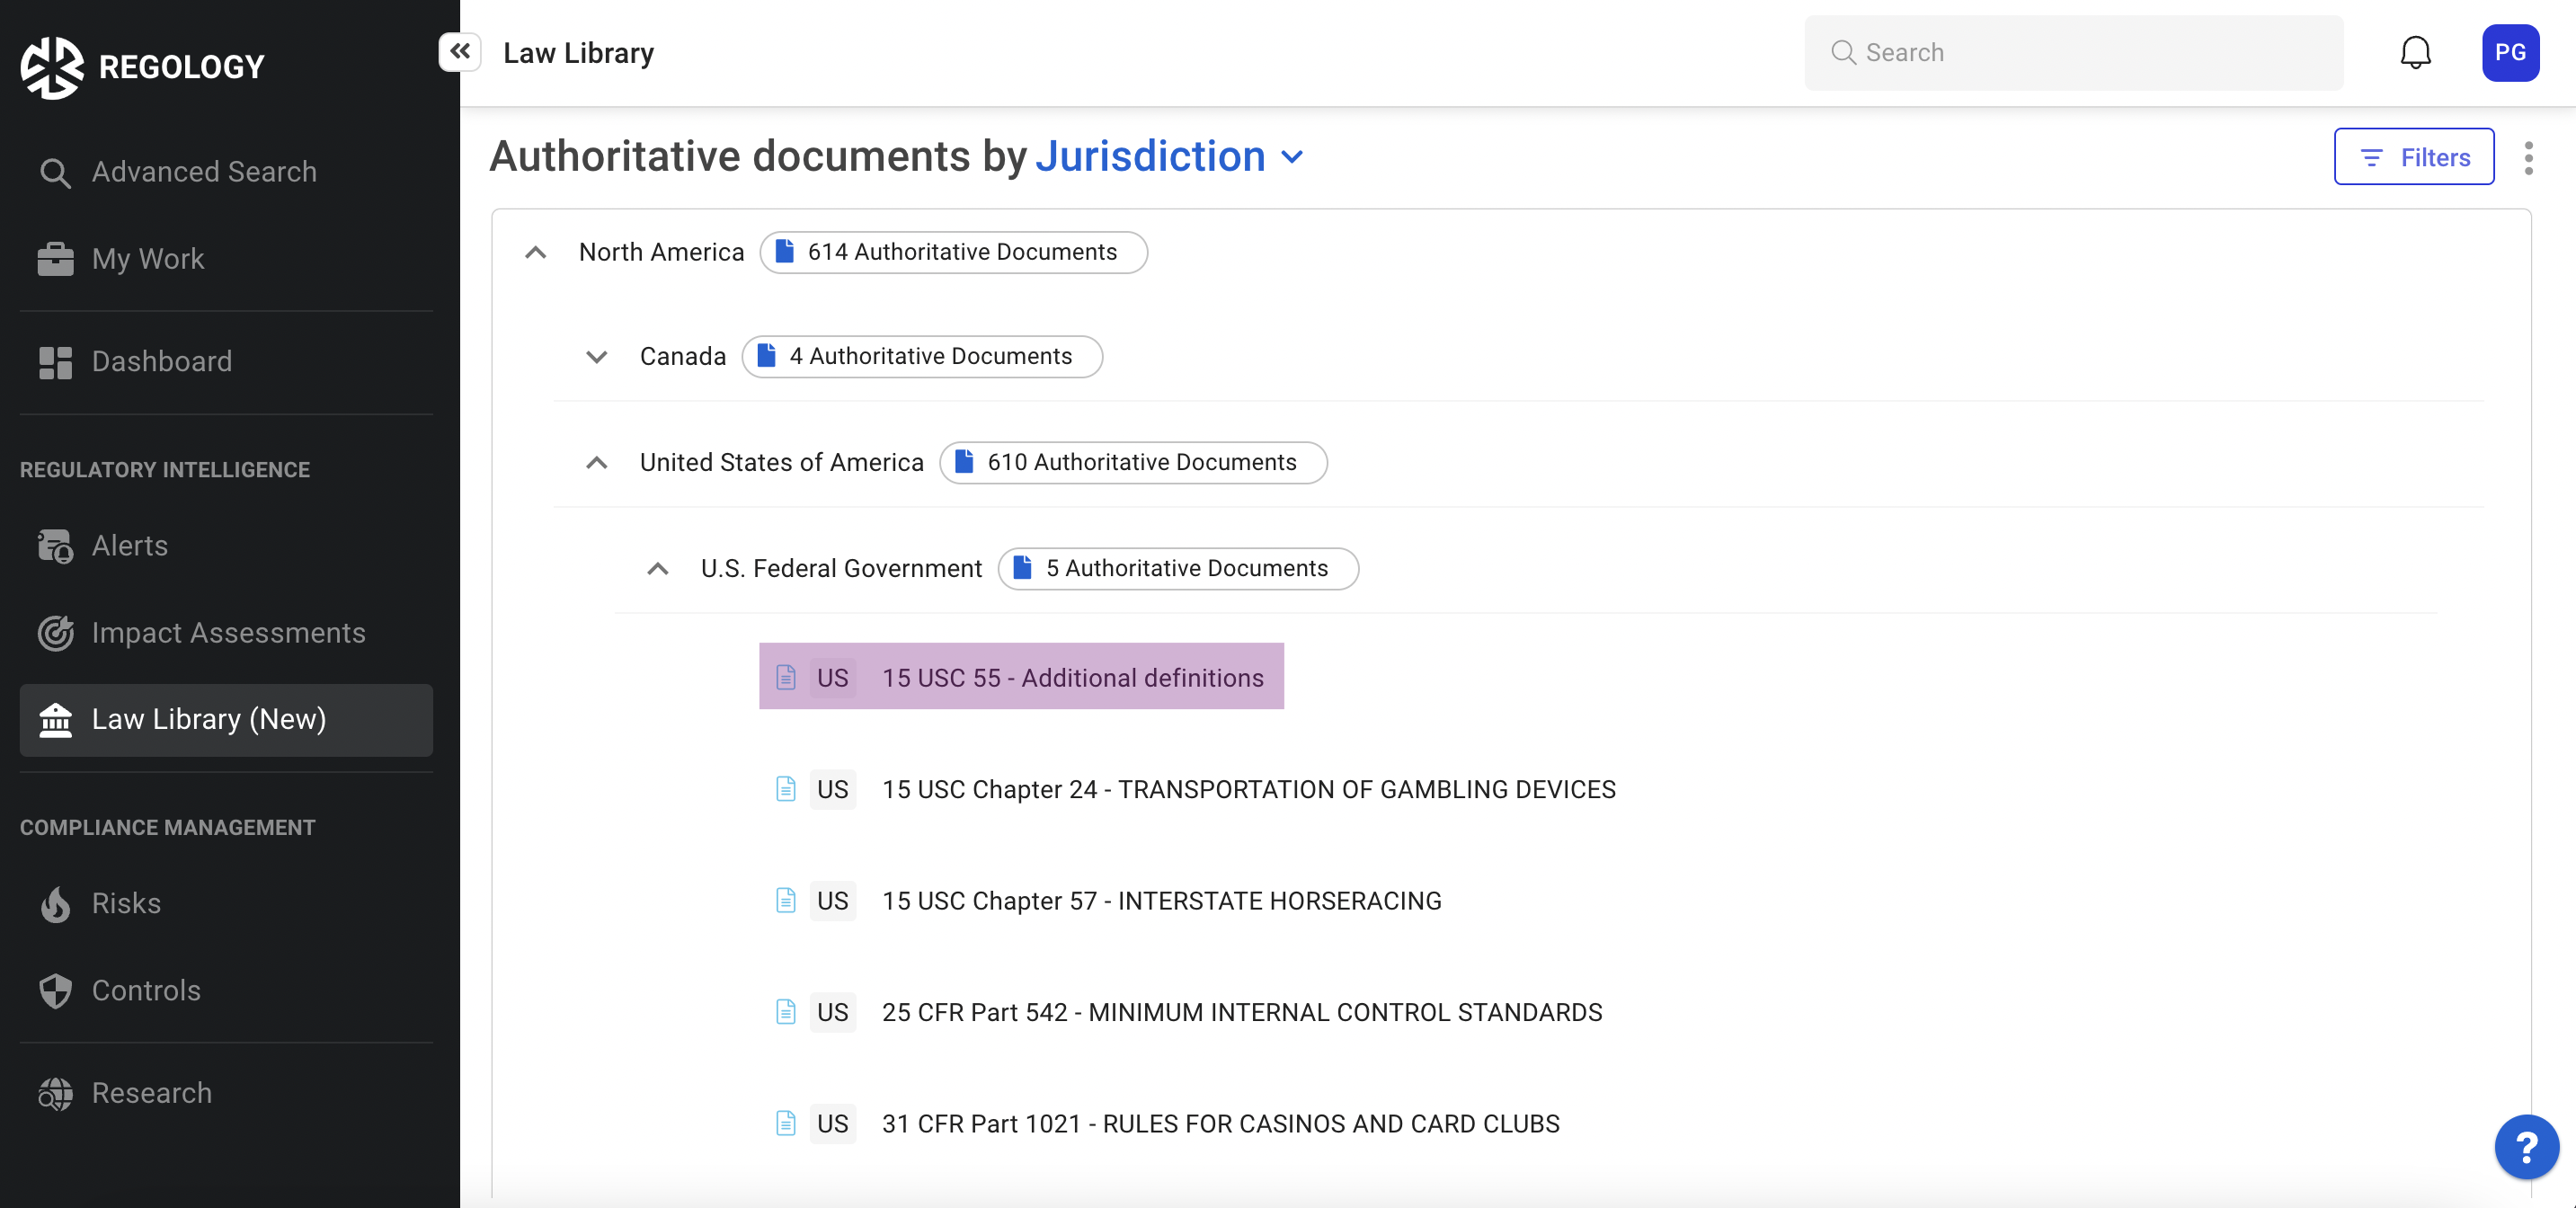
Authoritative Documents
Navigating to an Authoritative Documents
To view an Authoritative Document, click on the corresponding document within the Law Library:
You will then be navigated to the corresponding content:
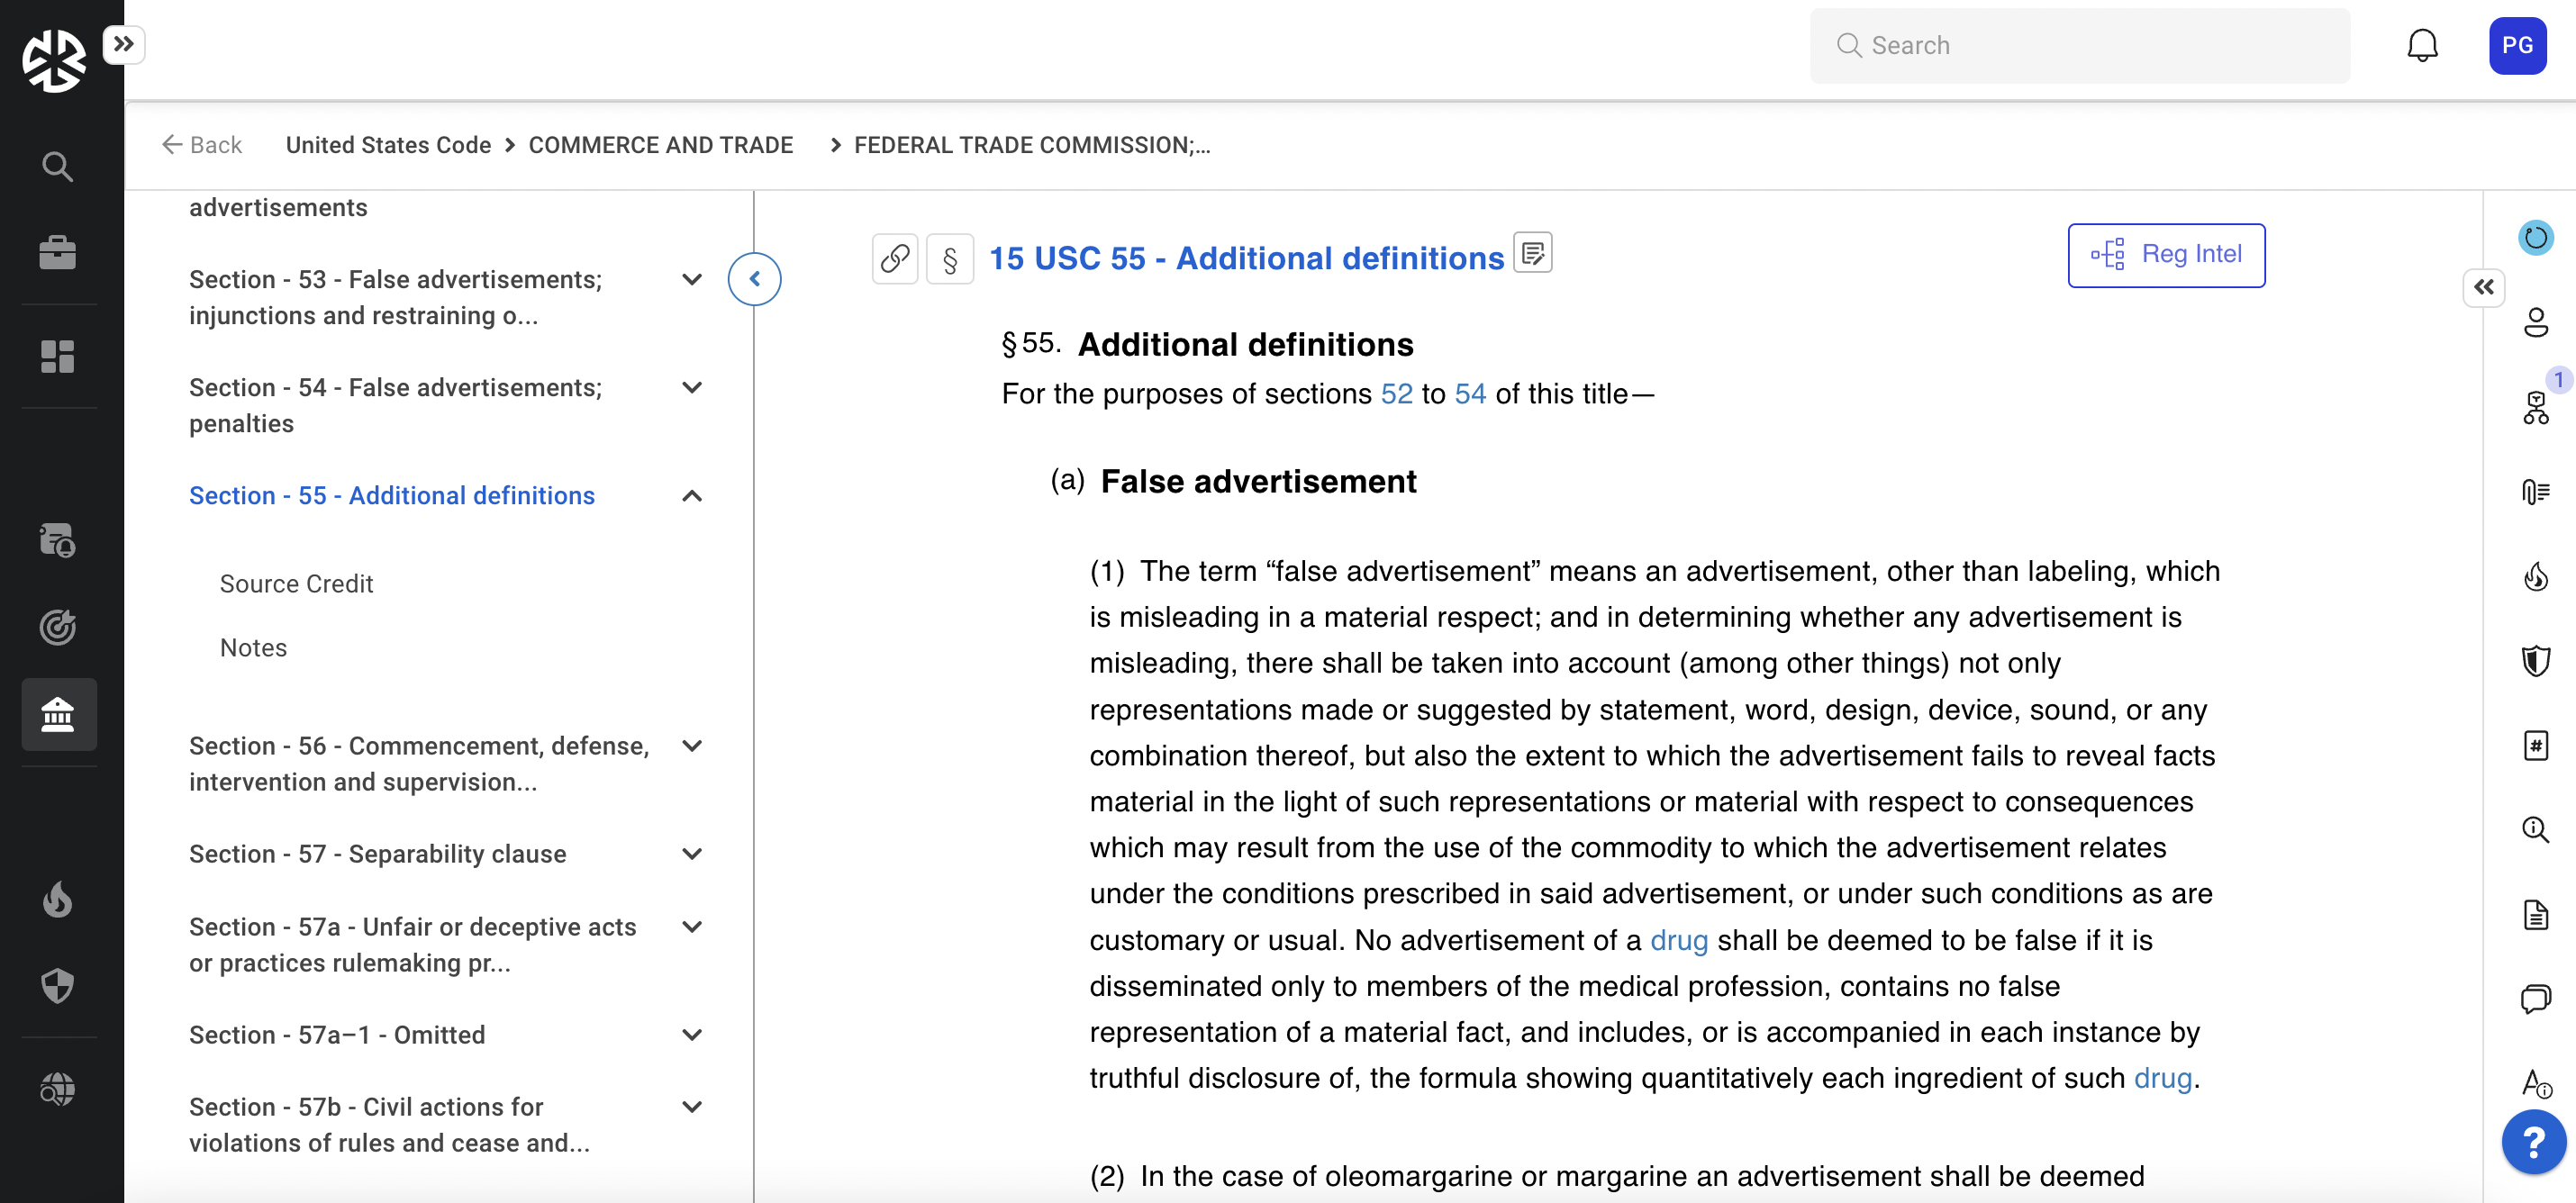
Authoritative Document Actions and Options
The right panel in an Authoritative Document view has icons that enable you to perform various actions, such as viewing the workflow status, viewing and setting applicability in the law library, mapping policies and procedures, and so on.
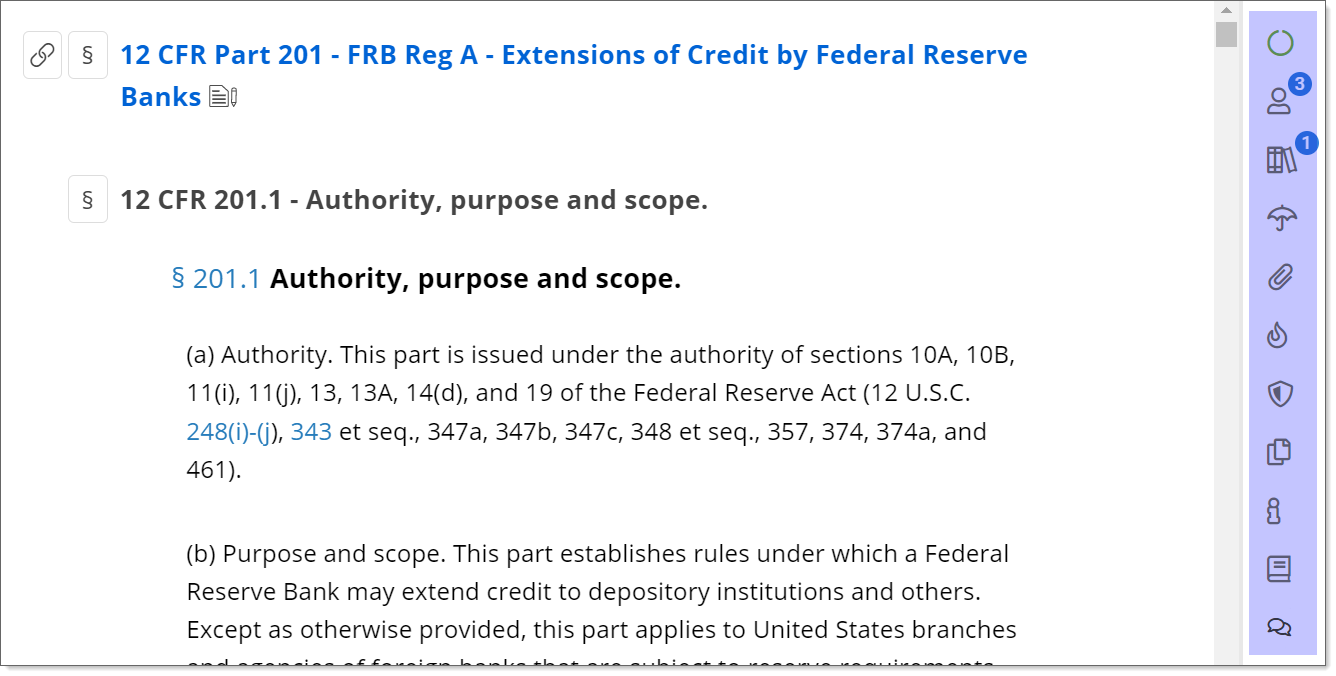
The following table describes the icons in the right panel that appears when you open an Authoritative Document.
Icon | Description |
|---|---|
 | View the compliance status. |
 | Map users. |
 | View and set applicability in the law library. |
 | Map policies and procedures. |
 | Attach related documents. |
 | Add and view risks. |
 | Add and view controls. |
 | View and compare versions, where possible. |
 | View supplementary information. |
 | Add and review comments. |
FR | Toggle Language where possible (from the language of the Authoritative Document to English and vice-versa). |
Managing the Compliance Status of an Authoritative Document
To view or update the compliance status of an Authoritative Document:
Click the Compliance Status icon in the right panel. The panel expands, displaying the current compliance status at the top, and all available compliance status options below it.
To update the compliance status of the Authoritative Document, click the applicable status.
Considerations for Managing Compliance Statuses
If you update the compliance status to Not Applicable, the application removes the Authoritative Document from the Law Library.
If the parent Authoritative Document is already added to the Law Library, you cannot update child document statuses.
By implication, if you update the compliance status of a parent document after you’ve updated the status of child-level documents, the new parent document status will override previously assigned statuses at the child levels.
Assigning Ownership of Authoritative Documents
To assign owners to an Authoritative Document, search for owners using the Search Users field and select the users that you want to assign to the open Authoritative Document.
Listing Areas Where an Authoritative Document is Applicable
To list areas where the open Authoritative Document is applicable:
Expand the Applicability section in the right panel.
Use the Search Applicability field to search and select other areas where the Authoritative Document is applicable.
If an Authoritative Document is applicable to many areas, click the Add to Applicability button to display the Applicability modal, where you can quickly navigate and select areas of applicability.
Assigning Applicable Policies and Procedures to Authoritative Documents
To assign policy and procedure documents to an Authoritative Document, you must attach them to it. To do so:
Click the Policies & Procedures expandable section in the right panel.
Click the Attach button to display options for attaching documents to the Authoritative Document.
Use the Search existing documents field to …
Click Upload to add a policy or procedure to the Authoritative Document. The Upload Policy modal appears. For details on working with this modal, see Creating & Uploading a Policy.
Attaching Related Documents to Authoritative Documents
To attach a related document to an Authoritative Document:
Click the Related Documents expandable section in the right panel.
Click the Attach button to display options for attaching documents to the Authoritative Document.
Use the Search existing documents field to …
Click Upload to attach a document to the Authoritative Document. The Upload Document modal appears. For details on working with this modal, see Mapping Related Documents.
Assigning Risks to an Authoritative Document
To assign risks to an Authoritative Document:
Click the Risks expandable section in the right panel.
Click the Assign Risk button to display options for assigning risks to the Authoritative Document.
Use the Search and add a risk field to select risks already uploaded to Regology, or click Create to add a new risk. The Create Risk > Create Control modal appears. For details on working with this modal, see Creating Risks.
Assigning Controls to an Authoritative Document
To assign controls to an Authoritative Document:
Click the Controls expandable section in the right panel.
Click the Assign Control button to display options for assigning controls to the Authoritative Document.
Use the Search and add a control field to select controls already uploaded to Regology, or click Create to add a new control. The Create Risk > Create Control modal appears. For details on working with this modal, see Creating Controls.
Viewing Versions of Authoritative Documents
To view versions of authoritative documents, click the Versions expandable section in the right panel.
Viewing and Inserting Supplementary Details
To view and add supplementary details associated with a document, click the Supplementary Details expandable section in the right panel.
You can add two supplementary details:
Popular Name
Popular Citation
To insert any of these details, simply type the detail that you want to add into the respective field and press <Enter>.
To edit a previously entered detail, click the Edit icon adjacent to the detail that you wish to edit, or simply click into the field to enable edits. Make your updates and press <Enter>.
Viewing and Inserting Authoritative Documents
To view and add Authoritative Documents associated with a document:
Click the Authoritative Documents expandable section in the right panel.
Click Assign Authoritative Document.
Search and select the Authoritative Document that you want to assign to the document.
You can similarly assign as many Authoritative Documents as required to the document.
Manage Reviews and Comments
To view and add reviews or comments to your authoritative document, click the Review and Comments expandable section in the right panel.
Adding Comments
To add a comment, enter the text required in the Add comment text box and click the Publish icon. Your comment appears below the text box, and you can add further comments as required.
To address your comment to a user, enter @ and then the name of the person, and select the appropriate name from the list of users that appears. You can similarly address your comment to multiple users.
To turn your comment into a task and assign it to a specific person, select the Create a task and assign it to check box and select the person to whom you want to assign the task. You can optionally enter a Due Date for the task in the field that appears.
Editing Your Comments
To edit a comment you made, click the Ellipsis icon adjacent to your comment. You can choose from the following options:
Edit: Enables you to update your comment.
Delete: Enables you to delete your comment.
Make Private: Helps you keep the comment private, so only you can see it.
When you are editing a task, the assignment options do not appear until you make an update to the comment text.
Viewing Technical Details Associated with an Authoritative Document
To view technical details associated with a document, click the Technical Details expandable section in the right panel.
The Technical Details expandable section offers the following details:
Document Date: The date on which the document was first published.
Last Modified Date: The date on which the document was last modified.
Expected Next Fetch Time: The date on which the document must be fetched again from its source to ensure that the content remains fresh. Click the Source link below the field to view the source document in a new tab.