To view Authority Documents in Law Library:
-
Navigate to the Law Library.
-
Click on a specific topic or jurisdiction to display the associated Authority Documents.
-
To view an Authority Document, click the 'Show' button next to it in the Law Library.
-
Use the Authority Documents by Topic dropdown to filter documents by topic, entity or jurisdiction.
Note: If any Authority Document (AD) is added to the Law Library, it automatically falls under the Jurisdiction Mapping by default.
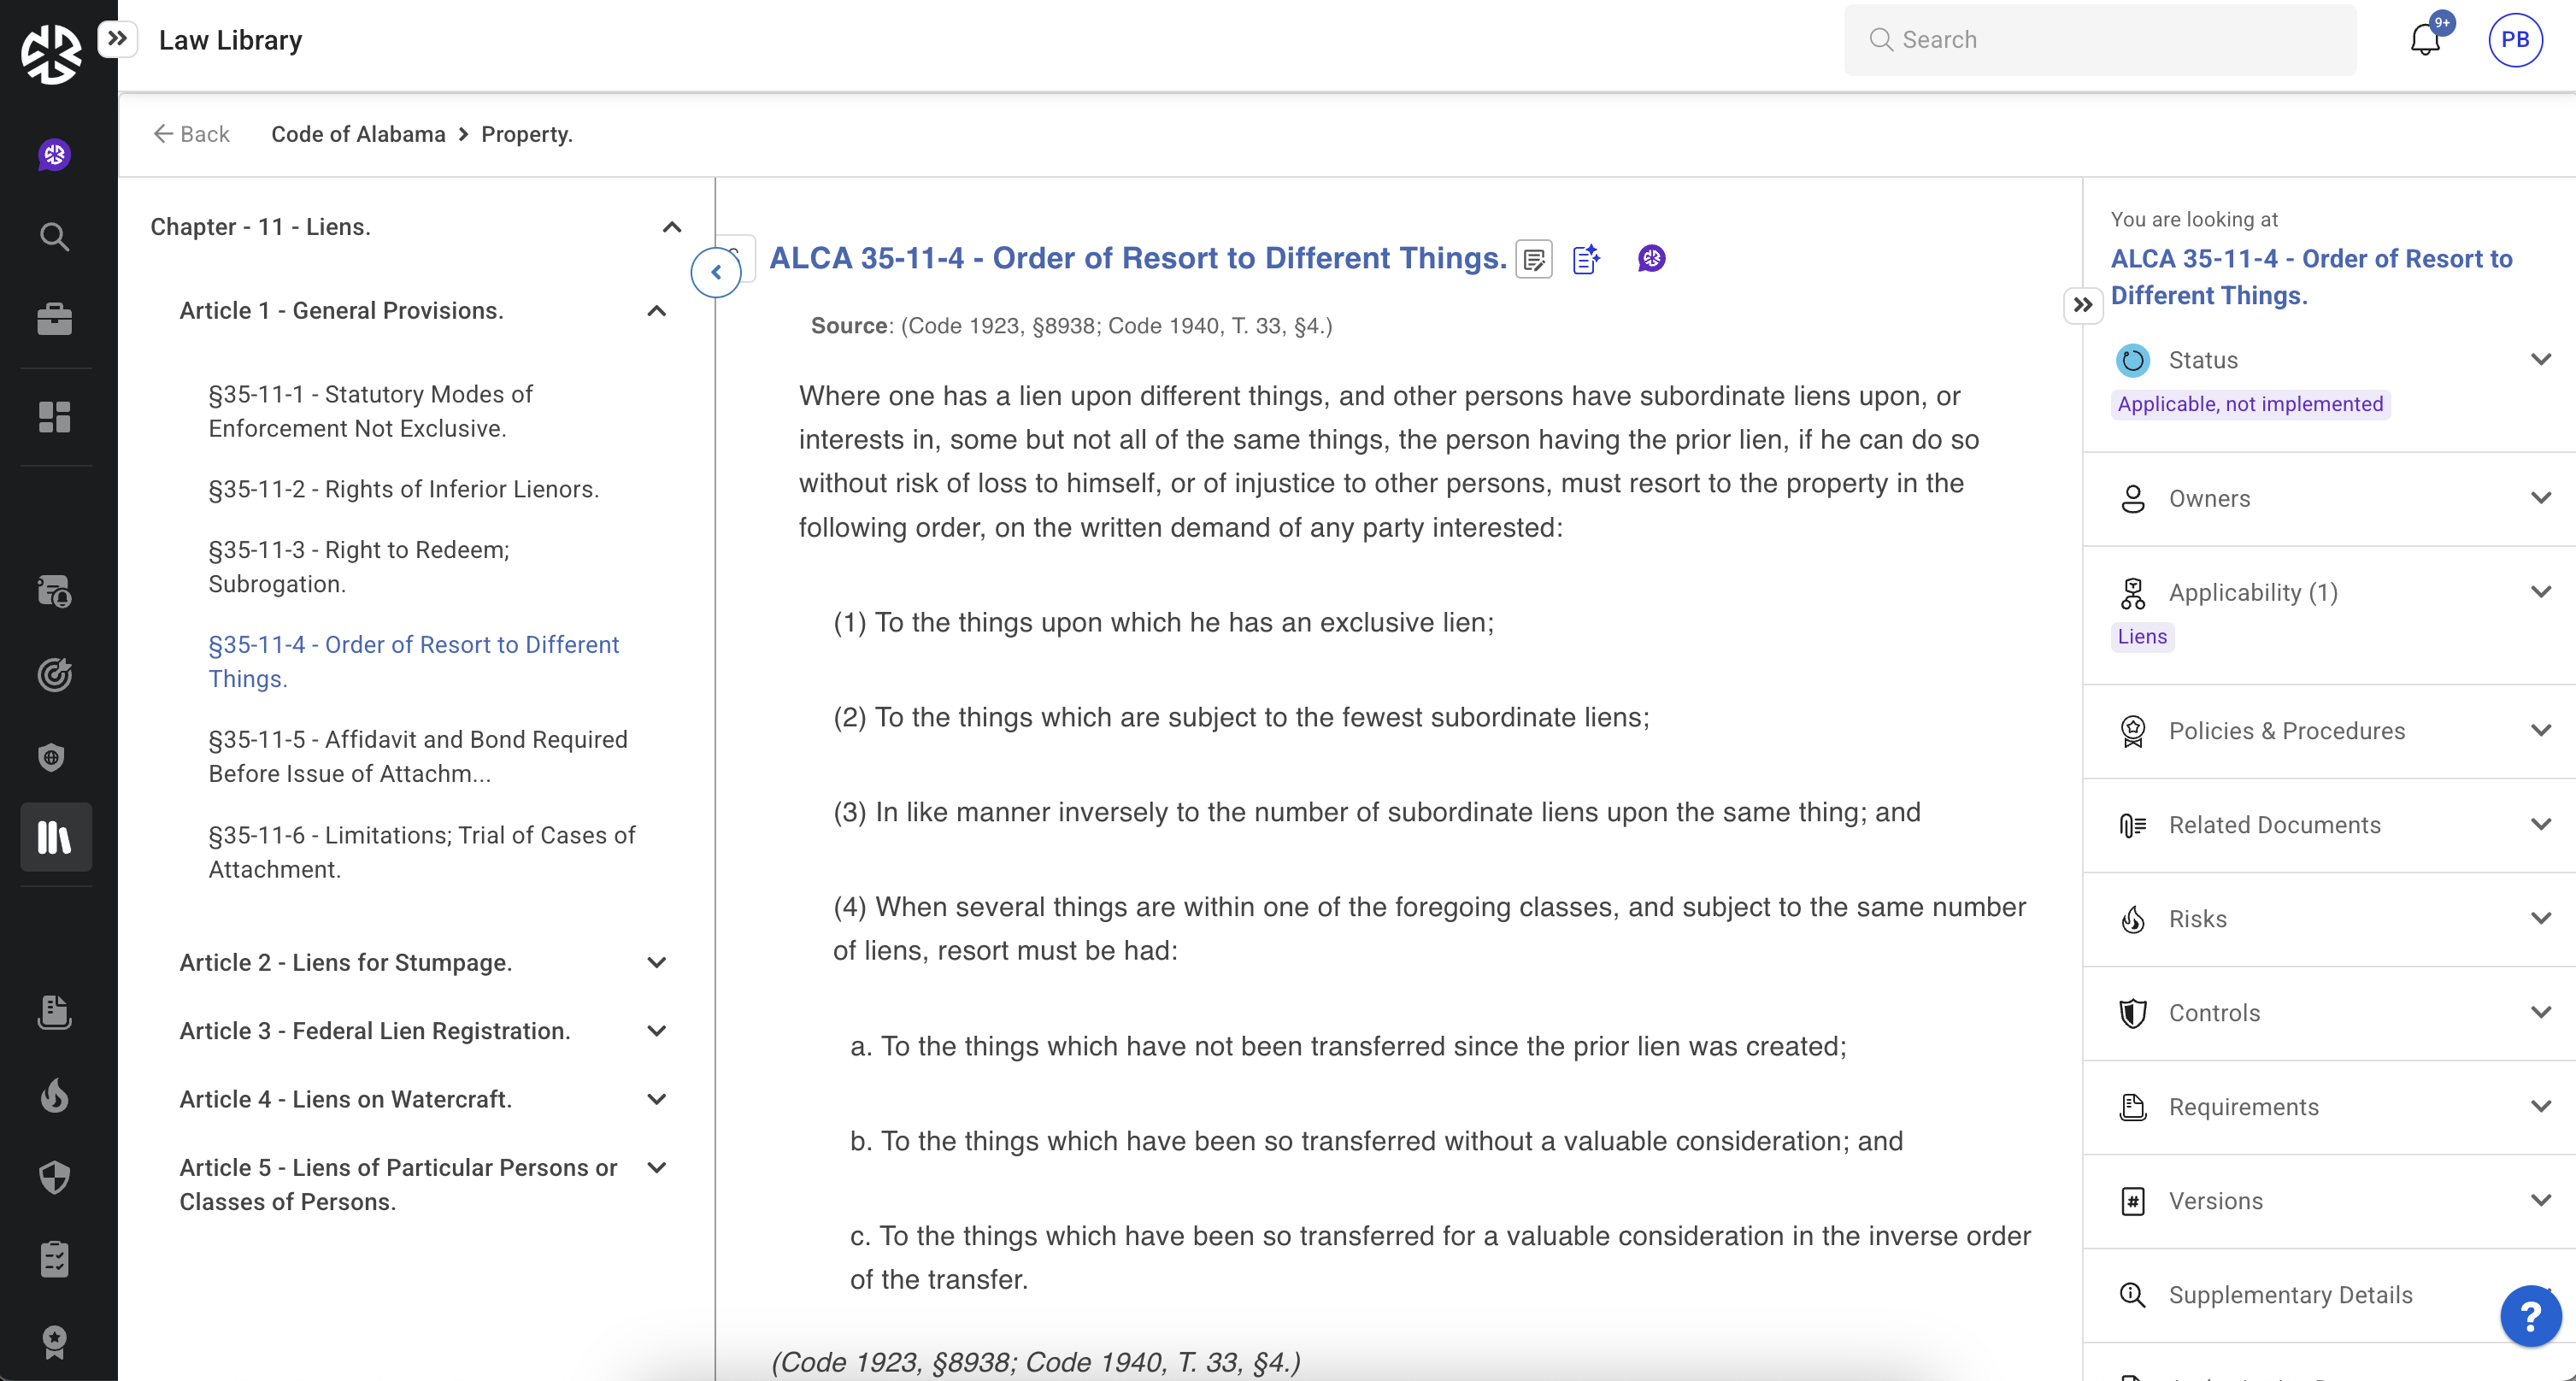
Right Panel Functionalities in Authority Documents
The right-hand panel provides various actions and options to manage Authority Documents. Below are the available sections in order, along with their descriptions:
-
Status
-
Displays the compliance status of the document.
-
You can update the status by selecting an option from the available compliance statuses.
-
-
Owners
-
Allows assignment of ownership to specific users/groups.
-
Use the "Search Users" field to find and select owners.
-
-
Applicability
-
Lists areas where the document is applicable.
-
Use the "Search Applicability" field to add new applicable areas.
-
Click Add to Applicability to open a modal for easier selection of multiple applicable areas.
-
-
Policies & Procedures
-
Enables attachment of policy and procedure documents to the Authority Document.
-
Click Attach to search and link existing documents or upload a new one.
-
-
Related Documents
-
Allows linking of related documents.
-
Click Attach to search for existing documents or upload a new one.
-
-
Risks
-
Assigns risks associated with the document.
-
Click Assign Risk to select an existing risk from Regology or create a new one.
-
-
Controls
-
Assigns controls relevant to the document.
-
Click Assign Control to select an existing control from Regology or create a new one.
-
-
Requirements
-
Displays the compliance requirements linked to the document.
-
You can view and manage specific regulatory requirements.
-
-
Versions
-
Lists different versions of the document.
-
Allows you to track and compare versions.
-
-
Supplementary Details
-
Stores additional information about the document. These attributes are configurable. For example:
-
Law Name – A commonly used name for the document.
-
Law Citation – A citation reference for the document used within the company.
-
-
-
Reviews & Comments
-
Enables adding and managing comments and reviews on the document.
-
To add a comment:
-
Type in the Add Comment box and click Publish.
-
Use @mention to tag users.
-
-
-
Technical Details
-
Displays metadata about the document, including:
-
Document Date: Latest data fetch date from the source (Document is up-to-date as of this date).
-
Last Modified Date: Date of most recent update.
-
Expected Next Fetch Time – When Regology will look for new updates from the source.
-
Source Link – A clickable link to the original document.
-
-
Reggi in Authority Documents
Reggi, Regology’s AI-powered assistant, enhances the usability of Authority Documents by providing instant insights and contextualized responses. Users can leverage Reggi to:
-
Summarize the document’s content for quick understanding.
-
Identify applicability, helping users determine whom the document applies to.
-
Assess compliance risks, including penalties of non-compliance.
-
Highlight exemptions that might impact compliance strategies.
-
Draft requirements to support regulatory implementation and compliance efforts.
-
Draft controls to align with regulatory expectations.
With Reggi, compliance teams can efficiently navigate, interpret, and act on regulatory content, reducing manual effort and improving decision-making.
Managing the Status of an Authority Document
Viewing or Updating Status
-
Click the Status icon in the right panel.
-
The panel expands, showing the current status and available status options.
-
Click the applicable status to update it.
Considerations for Status Management
-
If set to Not Applicable, the document is removed from the Law Library.
-
If the parent document is added to the Law Library, child documents cannot have independent statuses.
-
Updating a parent document’s status will override previously assigned statuses for child documents.
Assigning Ownership of Authority Documents
-
Open the document in the Law Library.
-
In the right panel, navigate to the Owners section and locate the Search Users/Groups field.
-
Search and select the users/groups to assign ownership to the document.
Listing Areas of Applicability
-
Expand the Applicability section in the right panel.
-
Use the Search Applicability field to find and select applicable areas.
-
If multiple areas apply, click Add to Applicability to open the Applicability modal for bulk selection.
Assigning Applicable Policies and Procedures
-
Expand the Policies & Procedures section in the right panel.
-
Click Attach to open document attachment options.
-
Use the Search existing documents field to locate and attach an existing document.
-
Click Upload to add a new policy or procedure.
Attaching Related Documents
-
Expand the Related Documents section in the right panel.
-
Click Attach to open document attachment options.
-
Use the Select an existing documents field to find and attach an existing document.
-
Click Upload to attach a new document.
Assigning Risks to an Authority Document
-
Expand the Risks section in the right panel.
-
Click Assign Risk to open risk assignment options.
-
Use the Select an Existing Risk field to choose a risk or or enter details and click Save.
Assigning Controls to an Authority Document
-
Expand the Controls section in the right panel.
-
Click Assign Control to open control assignment options.
-
Use the Select an Existing Control field to choose a control or enter details and click Save.
Viewing Versions of an Authority Document
-
Expand the Versions section in the right panel.
-
Review the document's historical versions.
Managing Assigned Authority Documents
-
Expand the Authority Documents section in the right panel.
-
Click Assign Authority Document.
-
Search and select the Authority Document to assign.
-
Multiple documents can be assigned as required.
Managing Reviews and Comments
Adding Comments
-
Expand the Review and Comments section in the right panel.
-
Enter text in the Add comment text box.
-
Click the Publish icon to submit.
-
Mention users using @username and assign tasks with the Create a task and assign it checkbox.
-
Optionally, set a Due Date for the task.
Editing Comments
-
Click the Ellipsis (⋮) icon next to a comment.
-
Choose one of the following options:
-
Edit: Modify the comment.
-
Delete: Remove the comment.
-
Make Private: Restrict visibility to yourself.
-
Viewing Technical Details
-
Expand the Technical Details section in the right panel.
-
Review the following fields:
-
Document Date: Latest data fetch date from the source (Document is up-to-date as of this date).
-
Last Modified Date: Date of most recent update.
-
Expected Next Fetch Time: Scheduled retrieval date for content updates.
-
Source: Click the link to view the source document.
-